In this chapter, you will learn the following thing:
1. Create and Design Entity Data Model in EDMX Designer
2. Create and Design Entity Class in EDMX Designer
3. Add Field in Entity Class
4. Add Relationship between Entities
1. Create and Design Entity Data Model in EDMX Designer
2. Create and Design Entity Class in EDMX Designer
3. Add Field in Entity Class
4. Add Relationship between Entities
Note: We divided this project into 4 Parts and this is the 2nd PART
Parts of this Project
Introduction to Model First Approach
PART 1: Create New MVC 5 Project and Install EF 6
PART 2:Create Entity Data Model and Class in EDMX Designer
PART 3: Generating Database From Entity Class Designed in EDMX
PART 4: Add Scaffolded Item and Run Your Project
Introduction to Model First Approach
PART 1: Create New MVC 5 Project and Install EF 6
PART 2:Create Entity Data Model and Class in EDMX Designer
PART 3: Generating Database From Entity Class Designed in EDMX
PART 4: Add Scaffolded Item and Run Your Project
Step 1:
Create and Design Entity Data Model in EDMX Designer
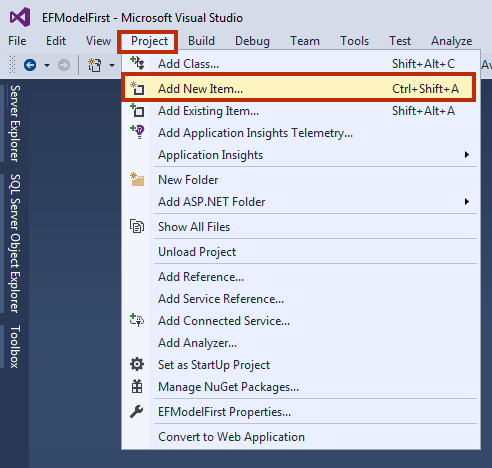
1. Click on Project Add New Item
2. Select Data in the left pane and select ADO.NET Entity Data Model in the middle pane. Give model name as
CustomerModel and click Add.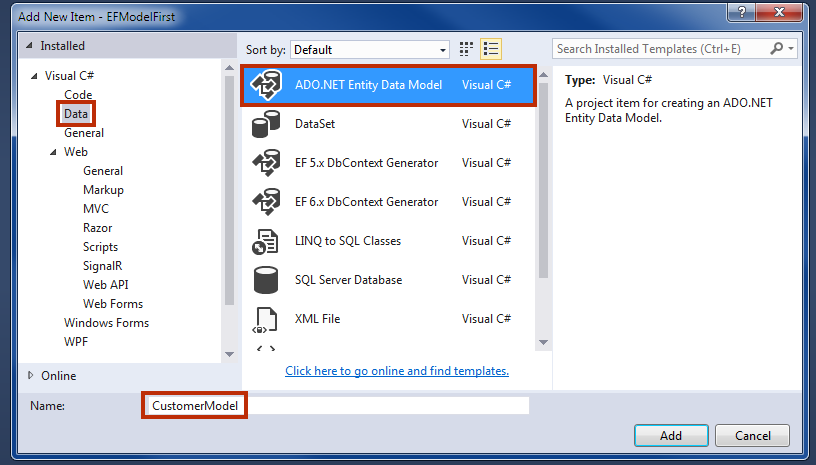 3. In the next window, select Empty EF Designer Model and click Finish.
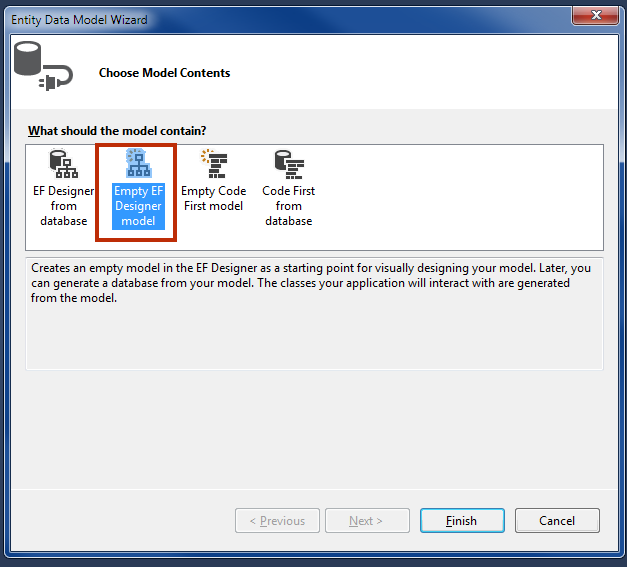 4. Now, you will be land on EDMX designer page.
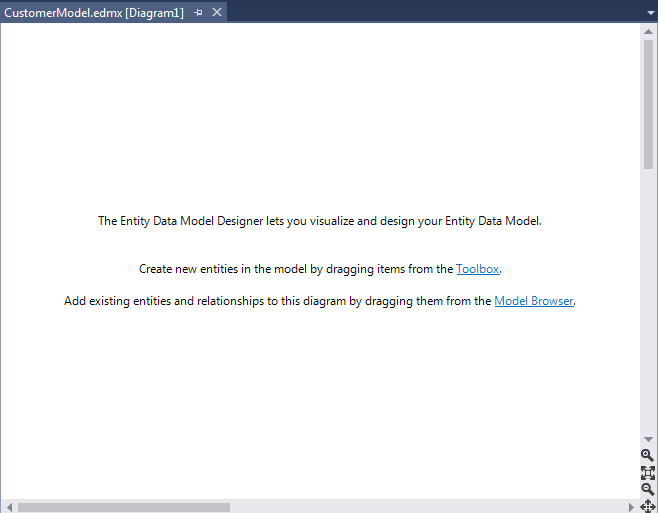
Step 2:
Create and Design Entity Class in EDMX Designer
Here, I am going to create two entity model CustomerProfile and CustomerPurchase. Both these entities will be connected with foreign key CustId.
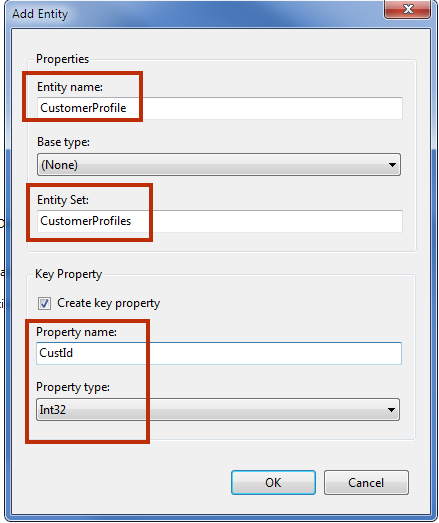
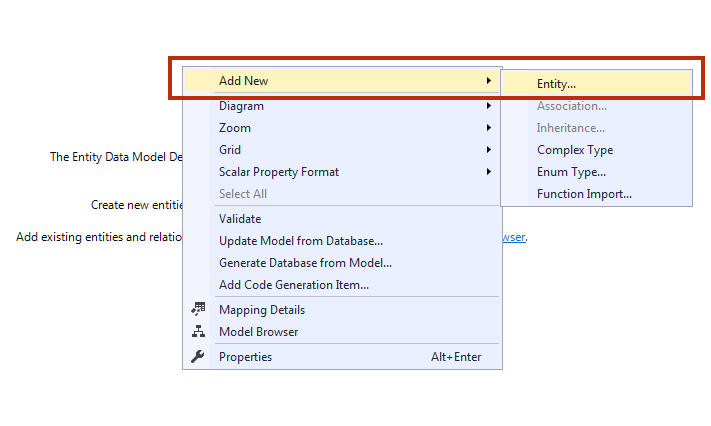 2. Give Entity name
 CustomerProfile. Entity Set will be auto assigned to CustomerProfiles. Set Key Property Name CustId. Click OK.
 3. You will see that a CustomerProfile Entity is created in the designer with a field CustID. Add some more fields into this CustomerProfile Entity class.
4. The same way creates one more Entity Class
CustomerPurchase.Step 3:
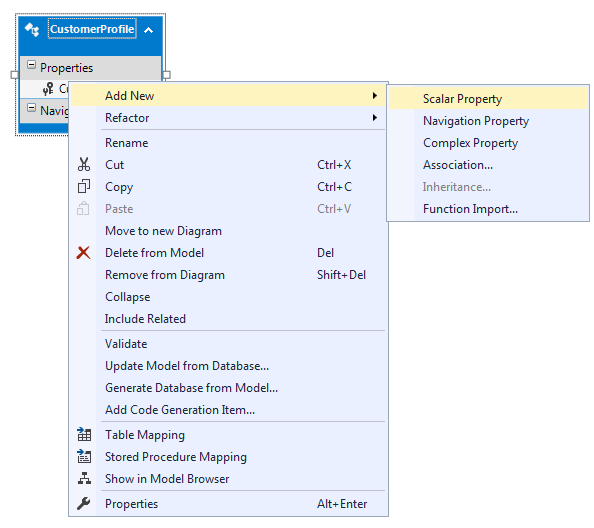
Add Field into
CustomerProfile and CustomerPurchase Entity class1. Right click on CustomerProfile Entity Add New Scalar Property.
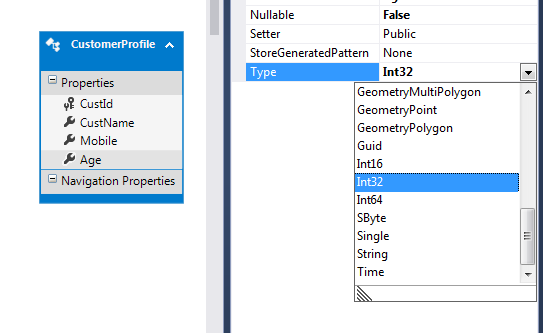
2. Add CustName, Mobile, and Age. You can change field property in Properties Window. Make Age data type to Int32.
3. The same way add Product, Price, and PurchaseDate in
CustomerPurchase Entity.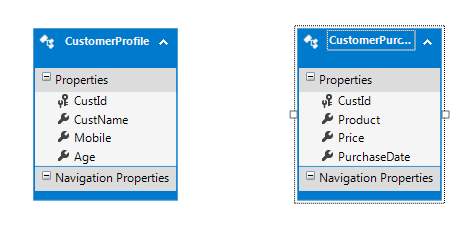
Step 4:
Add Relationship between two entities.
Here, we have 2 entities. CustomerProfile and CustomerPurchase. It is one to many relationships. It means that each customer has only one profile but can have multiple purchases. Only the customer who exists in Profile page can purchase an item.
Add association
1. Right click on CustomerProfile Entity Add New Association.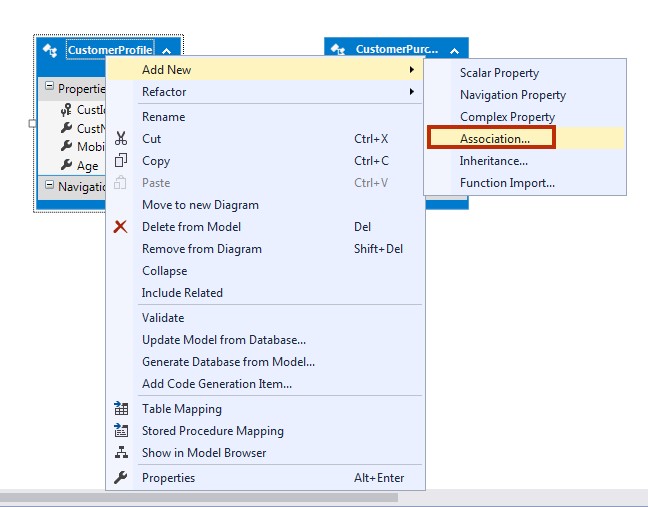
2. A window will open with some settings. Change settings according to the picture and click OK.
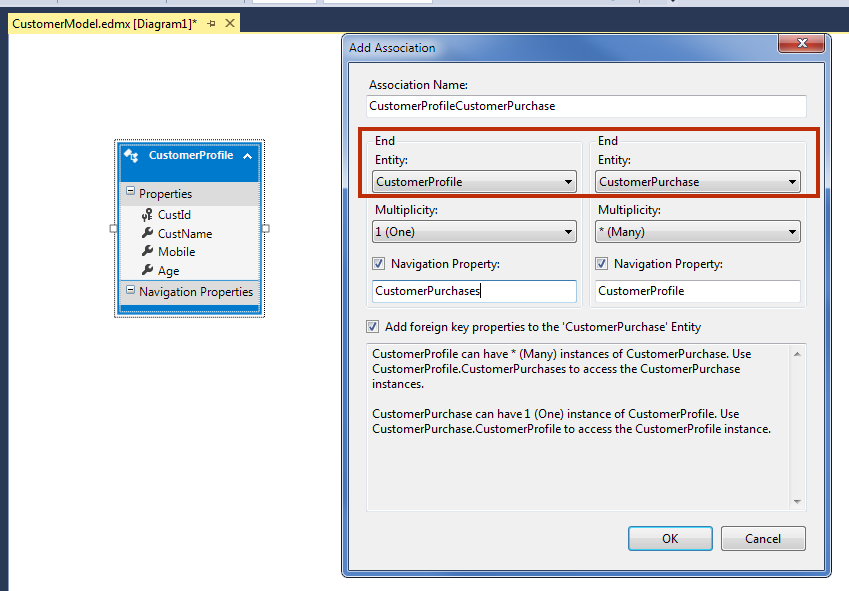
3. Now, you can see that one to many relationships between two entities is created. You will also notice that an extra field in CustomerProfileCustId is added into CustomerPurchase entity.

4. Build your project by pressing Ctrl + Shift + B.
5. Congratulations! You have designed your entity class in the designer. Now, it's time to generate database and table using this design.
Summary
In this chapter, you learned how to create entity data model and entity class in designer and also learned to add the association between entity class. In the next chapter, you will learn how to Generate Database from this Model.