There are 5 parts in this project and this is 4th Part.
PART 4:
PART 1. EF – New Database First Overview
PART 2. Start a New ASP.NET MVC Project
PART 3. Create New Database and Table for EF
PART 4.Install Entity Framework and Create Entity Data Model
PART 5. CRUD Operation using Entity Framework 6
PART 2. Start a New ASP.NET MVC Project
PART 3. Create New Database and Table for EF
PART 4.Install Entity Framework and Create Entity Data Model
PART 5. CRUD Operation using Entity Framework 6
If you haven't install Entity Framework yet, then you can install easily. Just read the following installing guide.
1. Right click on Project Name in Solution Explorer and Click Manage NuGet Packages…
2. NuGet Package Manager Window will be open. Here, Browse for Entity Framework. Now, Click Install Icon or Install button to Installing it into your project.
3. A Review Changes Dialog box will appear. Click OK.
4. Accept License Agreement by clicking on I Accept button.
5. Now, you can see Entity Framework under References in Solution Explorer.
Here, is a Step by Step Pictorial Guide of Installing Entity Framework 6.
Install Entity Framework 6 Pictorial Guide
Create Entity Data Model
Step 1:
Right Click on Model Folder in Solution Explorer and click Add > New Item.

Step 2:
Select Data in Left Pane and then choose ADO.NET Entity Data Model in the middle pane. Give the name to
BookDataModel and click Add.
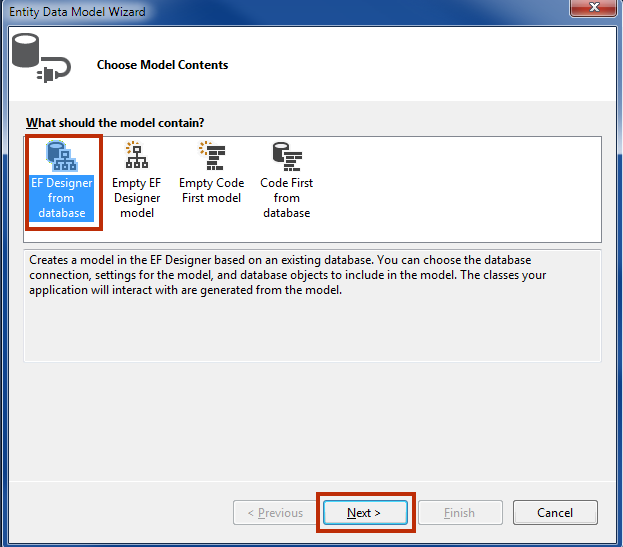
Step 3:
Entity Data Model Wizard will appear that will ask you to choose your data model. Choose EF Designer from Database and click Next.
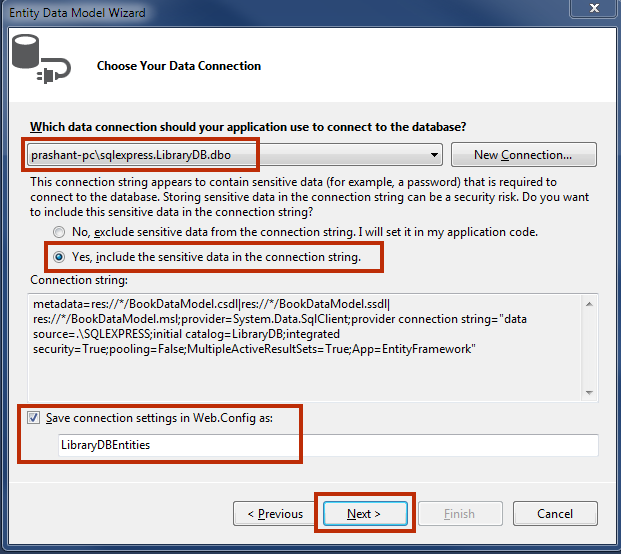
Step 4:
In the next wizard choose the connection properties for your connection string. Just check the radio button saying "Yes, include the sensitive data in the connection string." And make sure the check box is checked which asked you to "Save connection setting in Web.Config as:" and click Next.
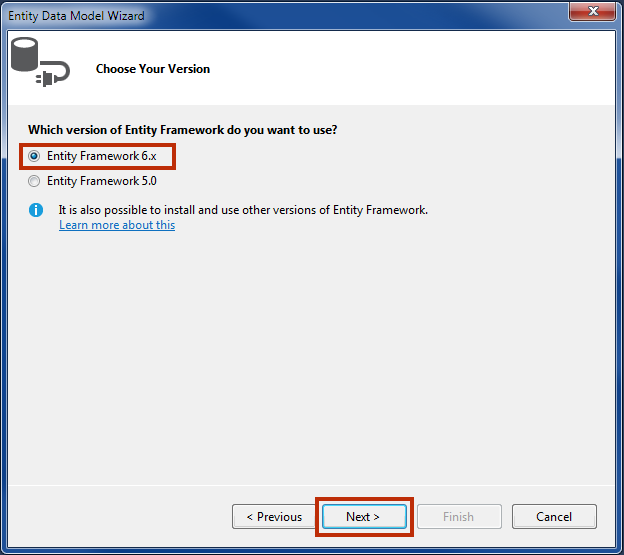
Step 4:
Select Entity Framework 6.x if Wizard asks you to choose Entity Framework version and click Next.
Step 5:
In the next Windows select object of the database. You must select your table
BookDetails and click Finish.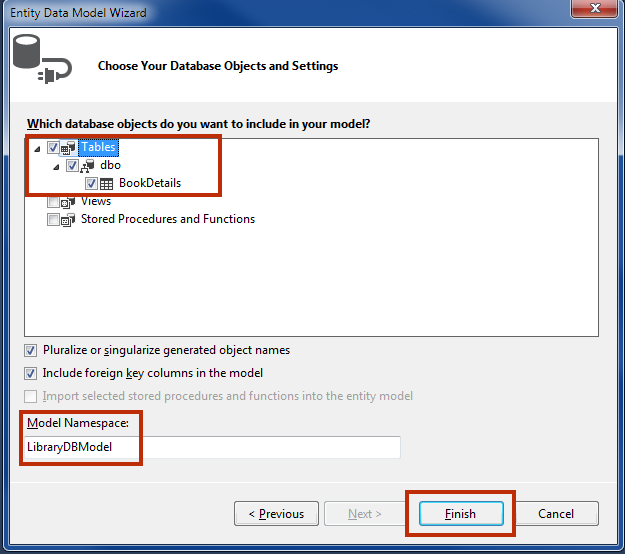
Step 6:
If everything goes fine then you will see your
BookDataModel in designer mode. 
Congratulations! You have successfully created entity data model from new database. Now you will see that inserting, updating and deleting operation with a table is so much easy with the help of your BookDataModel.
Note: You must build your application by pressing
Ctrl + Shift + B in visual studio otherwise you will get error messages when adding scaffolding to the controller.Summary
In this chapter, you learned Installing Entity Framework and Creating Entity Data Model. If you have successfully completed the steps till now then cheers because you are just a few steps ahead of your first CRUD operation with Entity Framework. Complete the next lesson and enjoy the victory over Entity Framework.