1. How to install Entity Framework 6 into your project?
You can install Entity Framework 6 via Nuget but following prerequisite should be installed on your PC before installing Entity Framework 6.
So, let’s start installing EF on your project.
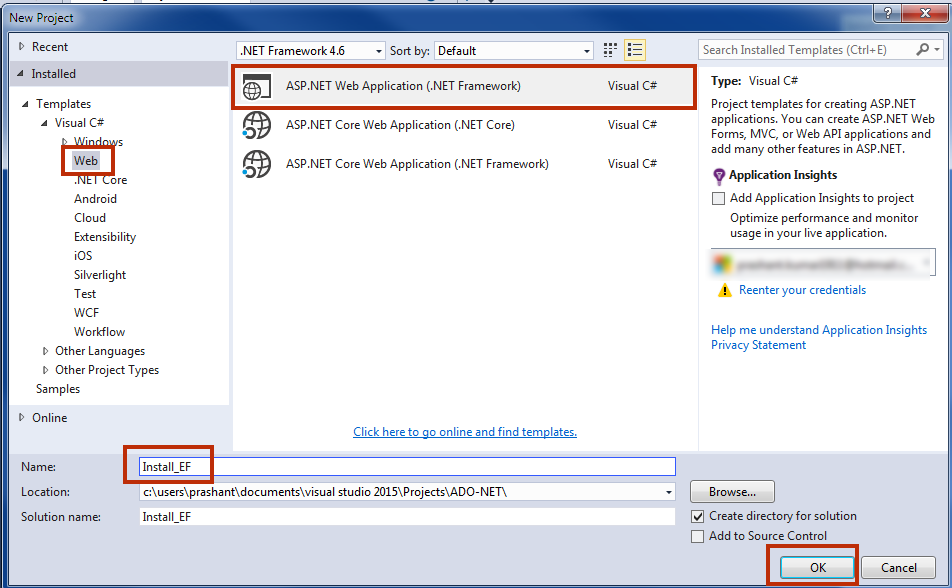
Step 1:
Open Visual Studio 2012 or 2015. Here, I am using VS 2015. Create
New ASP.NET WEB Application: Install_EF and click OK.
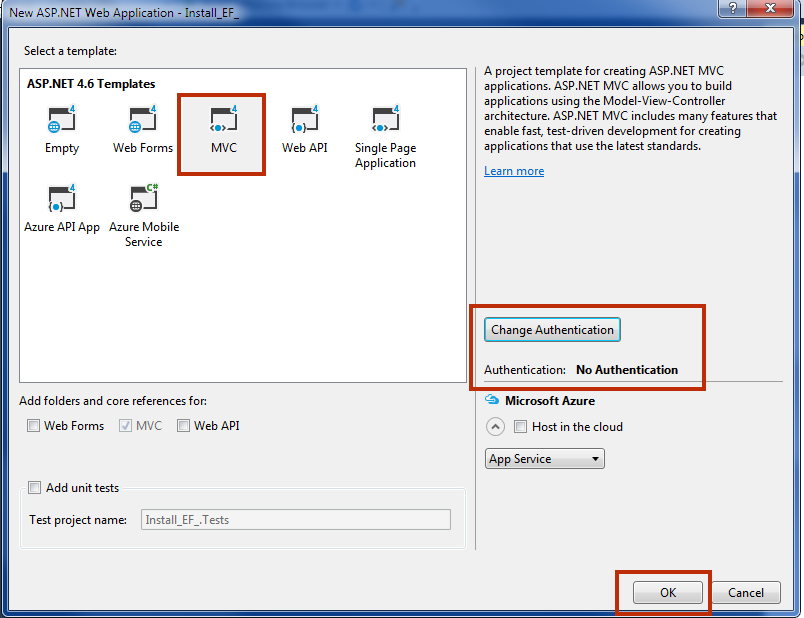
Step 2:
Select MVC in template window and change authentication to No Authentication and click OK.
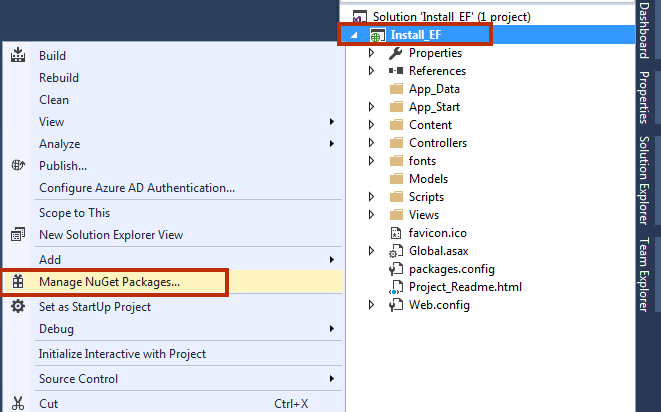
Step 3:
Open Solution Explorer. Right Click on your project name and select Manage NuGet Packages. You must have an active internet connection to install NuGet Package into your project.
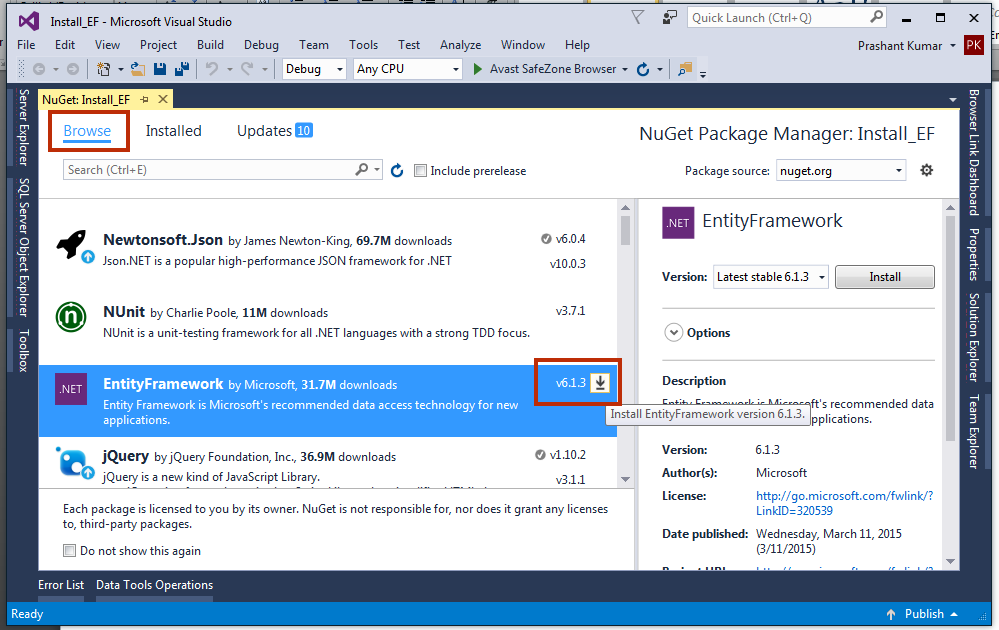
Step 4:
In NuGet Package Manager, find for Entity Framework and click on Install button to install it.
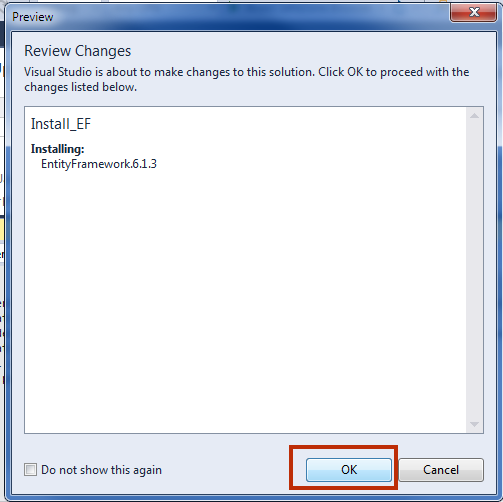
Step 5:
A Review Changes dialog box will appear asking your confirmation to changes. Click OK.
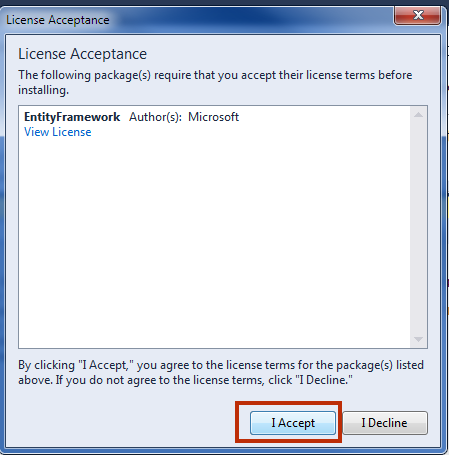
Step 6:
A License Acceptance window will appear. Click on I Accept to start Installation. The installation will take just a few seconds.
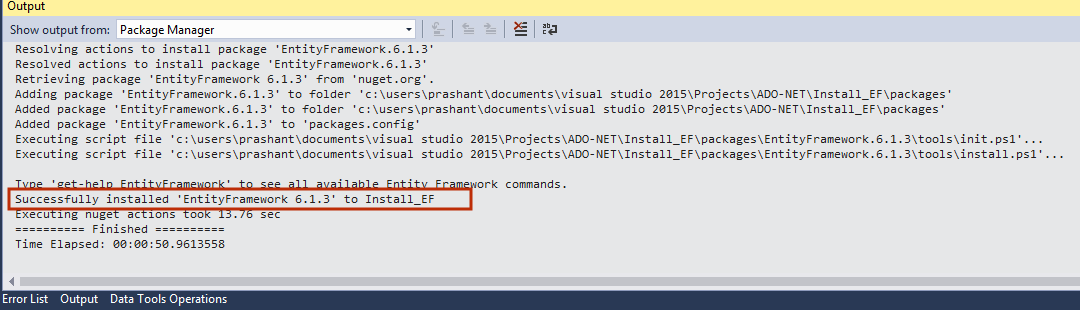
Step 7:
You will see a VS Output Window installing Entity Framework.
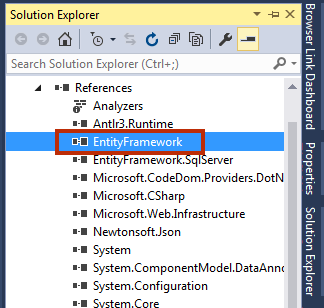
Step 8:
After installing, you can see it in Solution Explorer. Expand References in Solution Explorer and here you can see that EF has been installed into your project successfully.
Summary
In this chapter, you learned how to install Entity Framework into your Project. In the next chapter, you will create your first demo project using Entity Framework 6. You must complete the next chapter because it is gonna to give you a whole view of Entity Framework in a single project. Next chapter is Overview of EF6 with New Database