- How to add a controller in ASP.Net Core 1.0 App?
- HTTPGET and HTTPPOST method
- How to receive and send data to view page
How to add a Controller in ASP.NET Core 1.0 App?
In the previous chapter you learned what are controllers and their importance in MVC. In this chapter you will learn how to add a controller and write logic in it. So before telling you more theory about controllers why shouldn’t make a demo program. It will help you to visualize controller clearly.
-
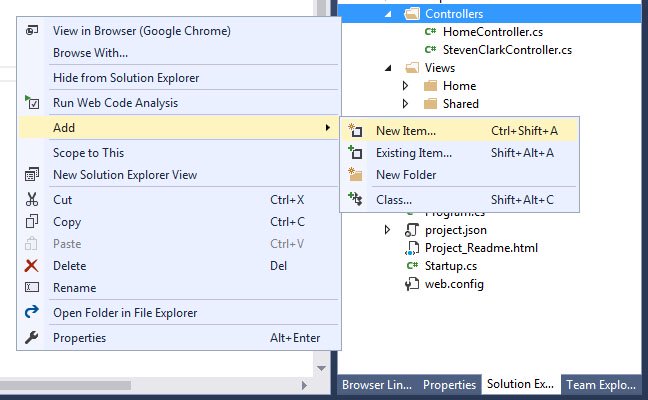
Controllershould be same named as View Folder. For example, if you have a folder in View Home that keeps several view pages then your controller must be same name as folder. In this condition controller name would be HomeController - Every Controller must add suffix
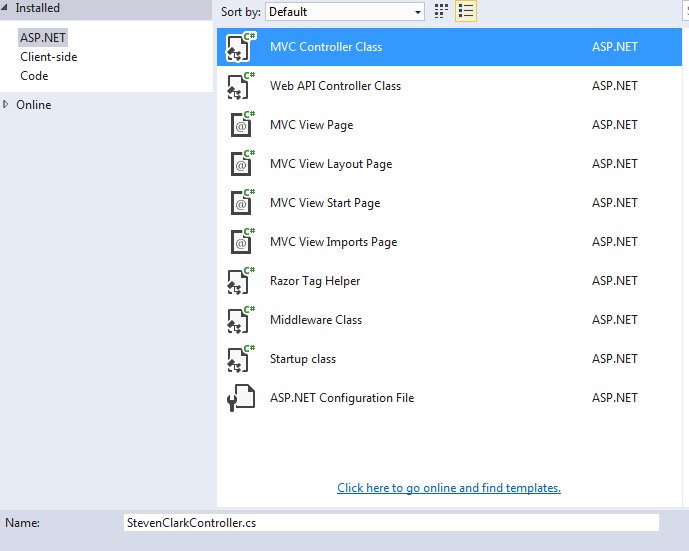
ControllerFor example,HomeController,UserController,ProfileControlleretc. - To add a controller, Right Click on Controllers Folder Add New Item. Here, select ASP.NET in left panel under Installed template and select MVC Controller Class in central panel.
Example:
In this following example, I will try to achieve following goals.- Create New Project – HelloMVC
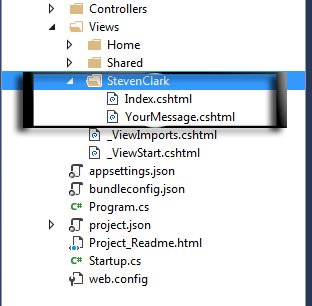
- Add a folder in View StevenClark
- This folder will keep two view pages. Index.cshtml and YourMessage.cshtml Page.
- I will add StevenClarkController for this Folder in Controller section.
- There will be a text box and submit button on YourMessage.cshtml page. Button press will display text box messages on the screen.
Here we go!
Adding a View
Adding a Controller
Now What Next?
Congratulations! You have successfully added all the view pages and respective controllers. Now, what next? The next is designing your View Page with controls and colors.
@{
ViewBag.Title = "Index Page";
}
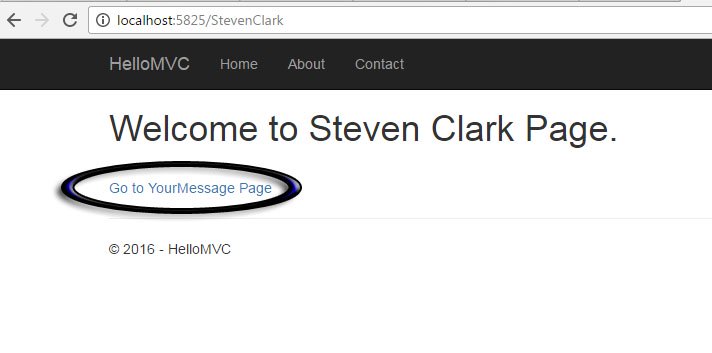
<h1>Welcome to Steven Clark Page.</h1>
<br />
<a asp-controller="StevenClark" asp-action="YourMessage">Go to YourMessage Page</a>
In this link there are two properties used.
<a asp-controller="StevenClark" asp-action="YourMessage">Go to YourMessage Page</a>asp-controller tells to go to StevenClark Controller and asp-action tells to find YourMessage action method in this controller.
And as you Know ViewBag is a dynamic property that is used to pass temporary data between controllers and view. If you are not comfortable with view then you must read this single chapter which explains ViewBag, ViewData and TempData.
using Microsoft.AspNetCore.Mvc;

// For more information on enabling MVC for empty projects, visit http://go.microsoft.com/fwlink/?LinkID=397860

namespace HelloMVC.Controllers
{
    public class StevenClarkController : Controller
    {
        // GET: /<controller>/
        public IActionResult Index()
        {
            return View();
        }
        public IActionResult YourMessage()
        {
            return View();
        }
    }
}
Always remember, every view page needs an action method. This Action Method YourMessage() will be responsible to return view page to the browser.
Run the Program
Your Steven Clark Index Page will be open. Now click on the link Go to YourMessage page. It will land you on a blank Your Message page. Now we will design this page with controls and colors and achieve our desired output.
@{
ViewBag.Title = "Your Message Pages";
}
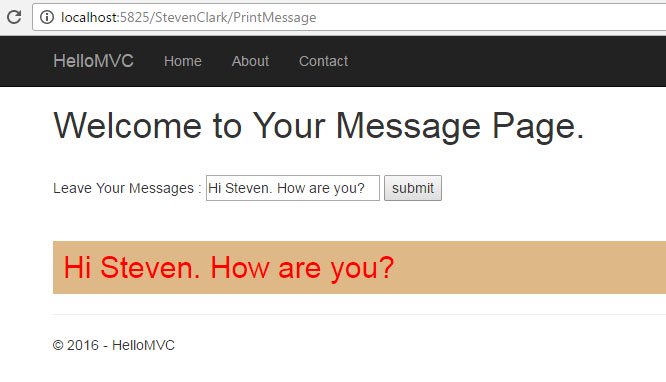
<h1>Welcome to Your Message Page.</h1>
<br />
<form asp-controller="StevenClark" asp-action="PrintMessage">
Leave Your Messages : <input name="Text1" type="text" />
<input id="Submit1" type="submit" value="submit" />
</form>
<br />
<h2 style="color:red; background-color:burlywood; padding:10px;">
@ViewBag.Messages
</h2>
using Microsoft.AspNetCore.Mvc;

namespace HelloMVC.Controllers
{
    public class StevenClarkController : Controller
    {
        // GET: /<controller>/
        public IActionResult Index()
        {
            return View();
        }
        public IActionResult YourMessage()
        {
            return View();
        }

       [HttpPost]
        public IActionResult PrintMessage()
        {
            string msg = HttpContext.Request.Form["Text1"].ToString();
            ViewBag.Messages = msg.ToString();
            return View("YourMessage");
        }
    }
}
Explanation:
[HttpPost]– It means that the form data is submitted with Post Method. In Post Method the submitted data is not attached with URL. So it is secure but little bit slow. In the [HttpGet] method, data travels through query string.
Learn More About [HttpPost] and [HttpGet] methodsRequest.Form["Text1"].ToString()– Received TextBox ValueMessages = msg.ToString()– Pass this message to ViewBag.Messages property.return View("YourMessage")– Now return YourMessage.cshtml View Page to browser.