- How to retrieve Database Table and Print as PDF in asp.net mvc?
In the previous article, I explained how can you convert and download any view page into PDF using Rotativa. In this article, I will explain how to print database output partial view as PDF.
Project Description
Here, I am creating a project and retrieving database table in view page. I will put a button to print each column detail as PDF. Here, I am using AdventureWorks database that is freely available to download for testing and learning purpose. You may use your own database or download AdventureWorks database from the Microsoft Site. Just google for it and you will see the download page.
1: Create a New Project.
Create a New MVC Project with any Name. Here, I am creating a new MVC Project PartialView_as_PDF_Example.
- Open Visual Studio 2015/2017/2019
- Go to File > New > Project
- Select Web in the left Pane and then select ASP.NET Web Application (.Net Framework) from the middle pane.
More Info: Create First ASP.NET MVC5 Project
2: Install Rotativa
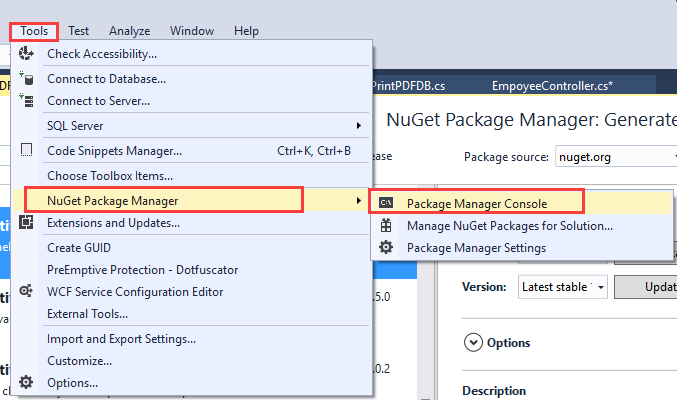
Install-Package Rotativa -Version 1.7.4-rc

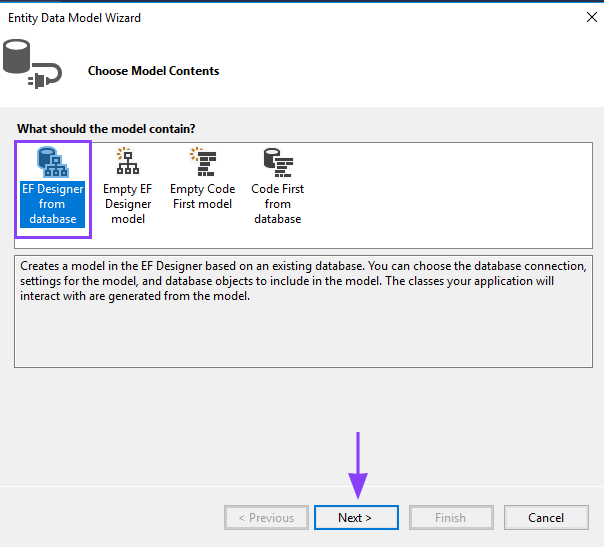
3: Add ADO.NET Entity Data Model
ADO.NET Entity Data Model Provides Dedicated and Easy way to implement Functionality for CRUD Operation. You don't need to write data logic as Entity Data Model automatically cares for most of the coding part.
PrintPDF_DataModel.


4: Create a New EmployeeController.cs
EmployeeController.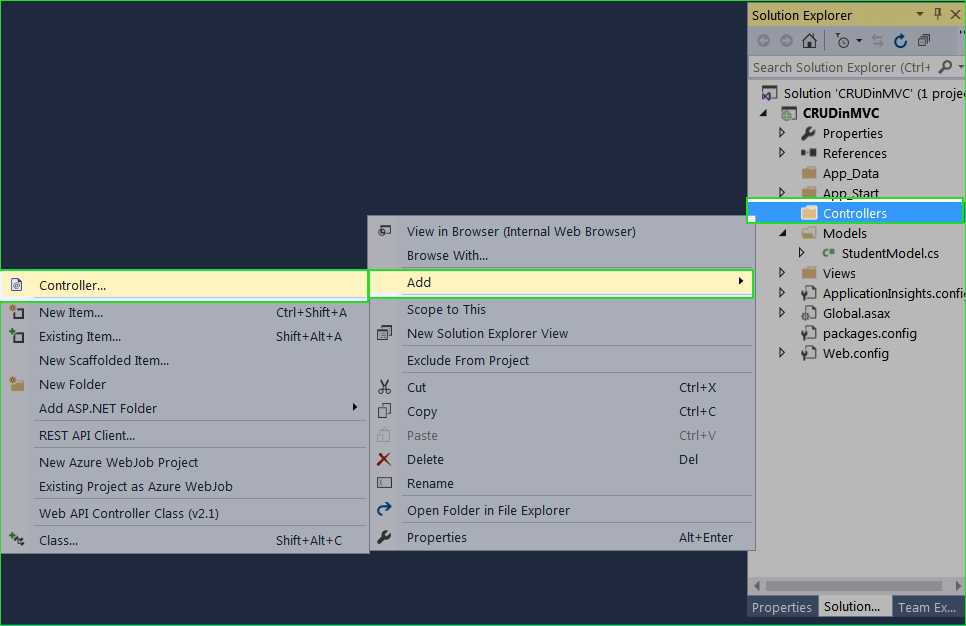
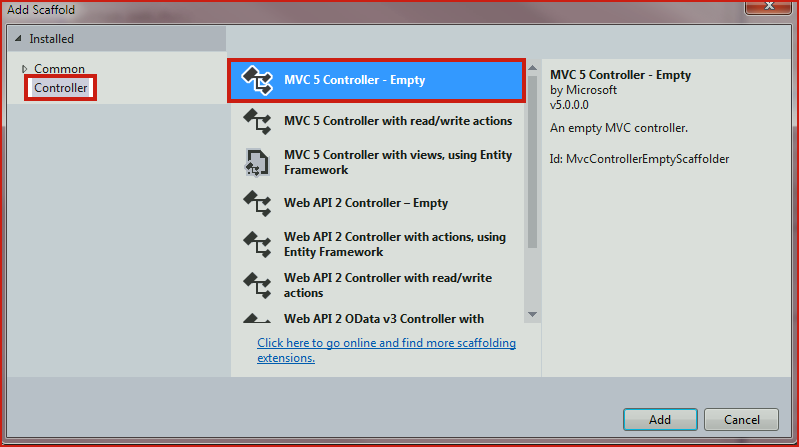

EmployeeController and Add the following code:
using System.Linq;
using System.Web.Mvc;
using Rotativa;

namespace PartialVew_as_PDF_Example.Controllers
{
    public class EmployeeController : Controller
    {
        // GET: Employee
        // Print the List of Employee Details
        public ActionResult Index()
        {
            using (AdventureWorks2017Entities db = new AdventureWorks2017Entities())
            {
                var employeeList = db.Employees.ToList();
                return View(employeeList);
            }
        }

        //Convert Index Page as PDF
        public ActionResult PrintViewToPdf()
        {
            var report = new ActionAsPdf("Index");
            return report;
        }

        //Convert partial Page as PDF
        public ActionResult PrintPartialViewToPdf(int id)
        {
            using (AdventureWorks2017Entities db = new AdventureWorks2017Entities())
            {
                Employee employee = db.Employees.FirstOrDefault(e => e.BusinessEntityID == id);
                var report = new PartialViewAsPdf("~/Views/Shared/DetailEmployee.cshtml", employee);
                return report;
            }
        }

    }
}
5: Adding View
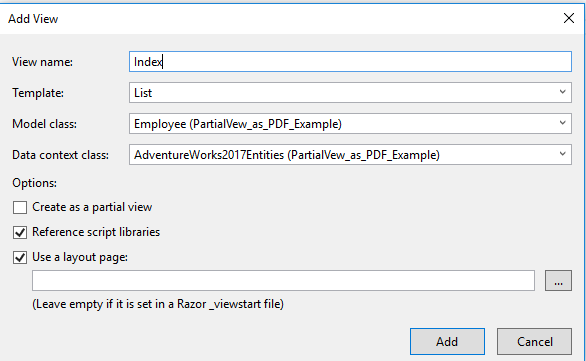
Template: List
Model class: Employee
Data context class: AdventureWorks2017Entities
@model IEnumerable<PartialVew_as_PDF_Example.Employee>
@{
ViewBag.Title = "Index";
}
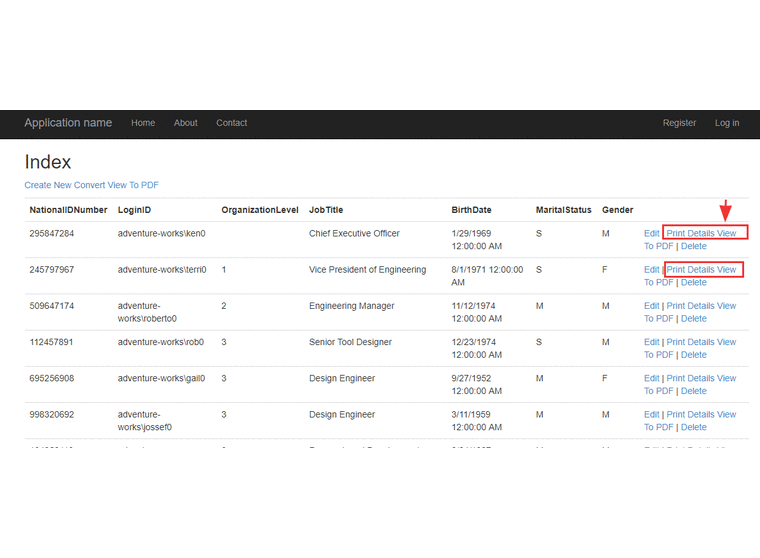
<h2>Index</h2>
<p>
@Html.ActionLink("Create New", "Create")
@Html.ActionLink("Convert View To PDF", "PrintViewToPdf")
</p>
<table class="table">
<tr>
<th>
@Html.DisplayNameFor(model => model.NationalIDNumber)
</th>
<th>
@Html.DisplayNameFor(model => model.LoginID)
</th>
<th>
@Html.DisplayNameFor(model => model.OrganizationLevel)
</th>
<th>
@Html.DisplayNameFor(model => model.JobTitle)
</th>
<th>
@Html.DisplayNameFor(model => model.BirthDate)
</th>
<th>
@Html.DisplayNameFor(model => model.MaritalStatus)
</th>
<th>
@Html.DisplayNameFor(model => model.Gender)
</th>
<th></th>
</tr>
@foreach (var item in Model) {
<tr>
<td>
@Html.DisplayFor(modelItem => item.NationalIDNumber)
</td>
<td>
@Html.DisplayFor(modelItem => item.LoginID)
</td>
<td>
@Html.DisplayFor(modelItem => item.OrganizationLevel)
</td>
<td>
@Html.DisplayFor(modelItem => item.JobTitle)
</td>
<td>
@Html.DisplayFor(modelItem => item.BirthDate)
</td>
<td>
@Html.DisplayFor(modelItem => item.MaritalStatus)
</td>
<td>
@Html.DisplayFor(modelItem => item.Gender)
</td>
<td>
@Html.ActionLink("Edit", "Edit", new { id=item.BusinessEntityID }) |
@Html.ActionLink("Print Details View To PDF", "PrintPartialViewToPdf", new { id = item.BusinessEntityID }) |
@Html.ActionLink("Delete", "Delete", new { id=item.BusinessEntityID })
</td>
</tr>
}
</table>

Template: Details
Model class: Employee
Data context class: AdventureWorks2017Entities
Select the checkbox Create as a partial view and then click on Add button.
6: Run your Project
Press F5 to run your project
.
Summary
In this article, I have used database and table to show the result in table and convert them into PDF using Rotativa tool. This is very easy to convert any page into PDF using Rotativa.