In this tutorial, you will learn:
1. What are Partial Views in ASP.NET MVC 5?
2. What is the Use of Partial Views
3. How to Create Partial Views in MVC?
4. Partial Views Pages Example
1. What are Partial Views in ASP.NET MVC 5?
2. What is the Use of Partial Views
3. How to Create Partial Views in MVC?
4. Partial Views Pages Example
What are Partial Views in ASP.NET MVC 5?
Partial View is a subpage of Main View page that keeps reusable parts of web pages. If your Main Page is too large then you can divide it into several pieces and store content into a partial page with a logical name. After that, you can call this partial page inside your main view page.
Let's take an exampleIf your main page is too large then you can divide it into several pieces like:
Header.cshtml : It may contain Header menu codeSidebar.cshtml : It may contain sidebar menuFooter.cshtml: It may contain footers code.How to Create Partial View Page?
Here, I am going to create several partial pages for my Layout page.1. Open Visual Studio and Start a New ASP.NET MVC 5 Project. I have already created an MVC 5 project in the previous chapter, so I will use this for creating a partial view page.
2. Open Solution Explorer > Views > Shared >
_Layout.cshtml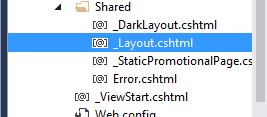
Here, is the complete code set of _Layout.cshtml
<!DOCTYPE html>
<html>
<head>
    <meta charset="utf-8" />
    <meta name="viewport" content="width=device-width, initial-scale=1.0">
    <title>@ViewBag.Title - My ASP.NET Application</title>
    @Styles.Render("~/Content/css")
    @Scripts.Render("~/bundles/modernizr")
</head>
<body>
    <div class="navbar navbar-inverse navbar-fixed-top">
        <div class="container">
            <div class="navbar-header">
                <button type="button" class="navbar-toggle" data-toggle="collapse" data-target=".navbar-collapse">
                    <span class="icon-bar"></span>
                    <span class="icon-bar"></span>
                    <span class="icon-bar"></span>
                </button>
                @Html.ActionLink("CompShop Studio", "Index", "Home", new { area = "" }, new { @class = "navbar-brand" })
            </div>
            <div class="navbar-collapse collapse">
                <ul class="nav navbar-nav">
                    <li>@Html.ActionLink("Home", "Index", "Home")</li>
                    <li>@Html.ActionLink("About", "About", "Home")</li>
                    <li>@Html.ActionLink("Contact", "Contact", "Home")</li>
                </ul>
            </div>
        </div>
    </div>
    <div class="container body-content">
        @RenderBody()
        <hr />
        <footer>
            <p>© @DateTime.Now.Year - My ASP.NET Application</p>
        </footer>
    </div>

    @Scripts.Render("~/bundles/jquery")
    @Scripts.Render("~/bundles/bootstrap")
    @RenderSection("scripts", required: false)
</body>
</html>
Now, I will break this page into several partial pages and then call that partial page into this layout page.
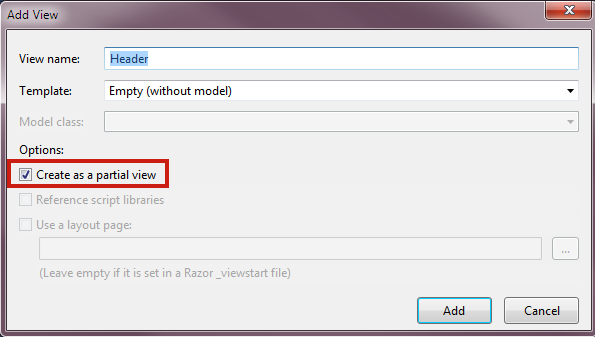
3. Right click on Shared Folder Add View. Create a view page Header and don’t forget to select checkbox Create as a partial view. Click Add button to Add Partial Page.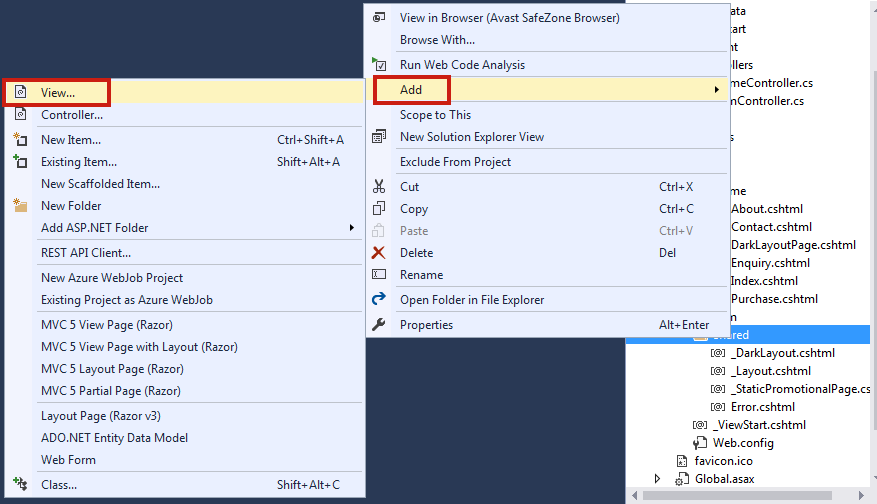 4. Now, find the following code in
 _Layout.cshtml and cut - paste it into Header.cshtml file.
Header.cshtml
<div class="container">
            <div class="navbar-header">
                <button type="button" class="navbar-toggle" data-toggle="collapse" data-target=".navbar-collapse">
                    <span class="icon-bar"></span>
                    <span class="icon-bar"></span>
                    <span class="icon-bar"></span>
                </button>
                @Html.ActionLink("CompShop Studio", "Index", "Home", new { area = "" }, new { @class = "navbar-brand" })
            </div>
            <div class="navbar-collapse collapse">
                <ul class="nav navbar-nav">
                    <li>@Html.ActionLink("Home", "Index", "Home")</li>
                    <li>@Html.ActionLink("About", "About", "Home")</li>
                    <li>@Html.ActionLink("Contact", "Contact", "Home")</li>
                </ul>
            </div>
        </div>
5. Call this partial page inside the _Layout.cshtml page like this.
_Layout.cshtml
<!DOCTYPE html>
<html>
<head>
    <meta charset="utf-8" />
    <meta name="viewport" content="width=device-width, initial-scale=1.0">
    <title>@ViewBag.Title - My ASP.NET Application</title>
    @Styles.Render("~/Content/css")
    @Scripts.Render("~/bundles/modernizr")
</head>
<body>
    <div class="navbar navbar-inverse navbar-fixed-top">
        @Html.Partial("Header")
    </div>
    <div class="container body-content">
        @RenderBody()
        <hr />
        <footer>
            <p>© @DateTime.Now.Year - My ASP.NET Application</p>
        </footer>
    </div>

    @Scripts.Render("~/bundles/jquery")
    @Scripts.Render("~/bundles/bootstrap")
    @RenderSection("scripts", required: false)
</body>
</html>
It is very easy to create a partial page.
More Facts about Partial Page:
1. It is an effective way to breaking up large view pages into smaller components.
2. A partial page is reusable so keep common content in the partial page and used wherever you want.
3. You can recall partial page inside a view page using following ways:
2. A partial page is reusable so keep common content in the partial page and used wherever you want.
3. You can recall partial page inside a view page using following ways:
@Html.Partial("ViewName")

// A view with this name must be in the same folder
@Html.Partial("ViewName.cshtml")

// Locate the view based on the application root
// Paths that start with ".php" or "~.php" refer to the application root
@Html.Partial("~/Views/Folder/ViewName.cshtml")
@Html.Partial("/Views/Folder/ViewName.cshtml")

// Locate the view using relative paths
@Html.Partial("../Account/LoginPartial.cshtml")
Summary
Partial View Page is very important and as a dot net developer, you will surely use it inside your project. In the next chapter, you will learn very important topic: Razor View Engine.