In this chapter, you will learn:
1. How to Pass Multiple Models Data to Views using View Model Class.
2. Complete Practical Example
1. How to Pass Multiple Models Data to Views using View Model Class.
2. Complete Practical Example
View Model
View Model is nothing, just a class that calls all models in a single class and then returns values to view pages. It becomes very useful when you have multiple models and want to display their value in one view pages.
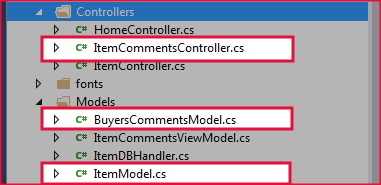
1. Create Models and Controllers
Before Starting this section, you must create following classes.Here, I am creating 2 models class:
ItemModels – It retrieves Item Details
Using System;
namespace CompShop.Models
{
    public class ItemModel
    {
        public int ID { get; set; }
        public string Name { get; set; }
        public string Category { get; set; }
        public decimal Price { get; set; }
    }
}
BuyersCommentsModel – It retrieves Comments
using System;
namespace CompShop.Models
{
    public class BuyersCommentsModel
    {
        public int BuyersID { get; set; }
        public string BuyersName { get; set; }
        public string StarRating { get; set; }
        public string CommentsTitle { get; set; }
        public string Comments { get; set; }
        public DateTime Date { get; set; }
    }
}
And 1 Controller class:
ItemCommentsController – It will retrieve Items and Comments from models. I have added some items and comments in controller class in order to reduce complexity. Using the same method you can display database value to view pages.
using System;
using System.Collections.Generic;
using System.Web.Mvc;
using CompShop.Models;

namespace CompShop.Controllers
{
    public class ItemCommentsController : Controller
    {
        // GET: ItemComments
        public ActionResult Index()
        {
            return View();
        }

        public ItemModel GetItemDetails()
        {
            ItemModel iModel = new ItemModel()
            {
                ID = 1,
                Name = "HP Printer",
                Category = "ComputerParts",
                Price = 8840
            };
            return iModel;
        }

        public List<BuyersCommentsModel> GetCommentList()
        {
            List<BuyersCommentsModel> CommentsList = new List<BuyersCommentsModel>();
            CommentsList.Add(new BuyersCommentsModel() { BuyersID = 1, BuyersName = "John", StarRating = "4", CommentsTitle = "Nice Product", Comments = "I Purchased it 1 week ago and it is working fine.", Date = Convert.ToDateTime("27 August 17") });
            CommentsList.Add(new BuyersCommentsModel() {BuyersID=2, BuyersName="Nicki", StarRating="2", CommentsTitle="Worst Product", Comments="Worst Product. Don't Buy It. I got damaged one.", Date=Convert.ToDateTime("12 June 17") });
            CommentsList.Add(new BuyersCommentsModel() {BuyersID=3, BuyersName="Serena", StarRating="3.5", CommentsTitle="Satisfactory", Comments="Go for it. It does the same job and have the less price", Date=Convert.ToDateTime("18 March 17") });
            CommentsList.Add(new BuyersCommentsModel() {BuyersID=4, BuyersName="William", StarRating="4.5", CommentsTitle="Superrr!!!", Comments="Don't think and buy it with confidence.", Date=Convert.ToDateTime("11 November 16") });

            return CommentsList;
        }

public ActionResult ItemCommentDisplay()
        {
        }
    }
}
2. Access Model Data using ViewModel
Step 1: Add an
ItemCommentsViewModel class in Model folder.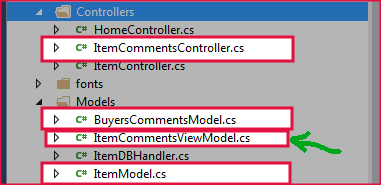
using System.Collections.Generic;
namespace CompShop.Models
{
    public class ItemCommentsViewModel
    {
        public ItemModel item { get; set; }
        public List<BuyersCommentsModel> comments { get; set; }
    }
}
Step 2: Add highlighted (Line: 42-49) code snippets in ItemCommentsController.
using System;
using System.Collections.Generic;
using System.Web.Mvc;
using CompShop.Models;

namespace CompShop.Controllers
{
    public class ItemCommentsController : Controller
    {
        // GET: ItemComments
        public ActionResult Index()
        {
            return View();
        }

        // *** 1. This Method contains dummy Item Details. ***
        public ItemModel GetItemDetails()
        {
            ItemModel iModel = new ItemModel()
            {
                ID = 1,
                Name = "HP Printer",
                Category = "ComputerParts",
                Price = 8840
            };
            return iModel;
        }

        // *** 2. This Method contains dummy Comment List. ***
        public List<BuyersCommentsModel> GetCommentList()
        {
            List<BuyersCommentsModel> CommentsList = new List<BuyersCommentsModel>();
            CommentsList.Add(new BuyersCommentsModel() { BuyersID = 1, BuyersName = "John", StarRating = "4", CommentsTitle = "Nice Product", Comments = "I Purchased it 1 week ago and it is working fine.", Date = Convert.ToDateTime("27 August 17") });
            CommentsList.Add(new BuyersCommentsModel() {BuyersID=2, BuyersName="Nicki", StarRating="2", CommentsTitle="Worst Product", Comments="Worst Product. Don't Buy It. I got damaged one.", Date=Convert.ToDateTime("12 June 17") });
            CommentsList.Add(new BuyersCommentsModel() {BuyersID=3, BuyersName="Serena", StarRating="3.5", CommentsTitle="Satisfactory", Comments="Go for it. It does the same job and have the less price", Date=Convert.ToDateTime("18 March 17") });
            CommentsList.Add(new BuyersCommentsModel() {BuyersID=4, BuyersName="William", StarRating="4.5", CommentsTitle="Superrr!!!", Comments="Don't think and buy it with confidence.", Date=Convert.ToDateTime("11 November 16") });

            return CommentsList;
        }

        // *** 3. This Method retrieves Items and Comments, and returns to Views.
        public ActionResult ItemCommentDisplay()
        {
            ItemCommentsViewModel IBCM = new ItemCommentsViewModel();
            IBCM.item = GetItemDetails();
            IBCM.comments = GetCommentList();

            return View(IBCM);
        }
    }
}
Step 3: Right-click on
ItemCommentDisplay Action Method and select Add View…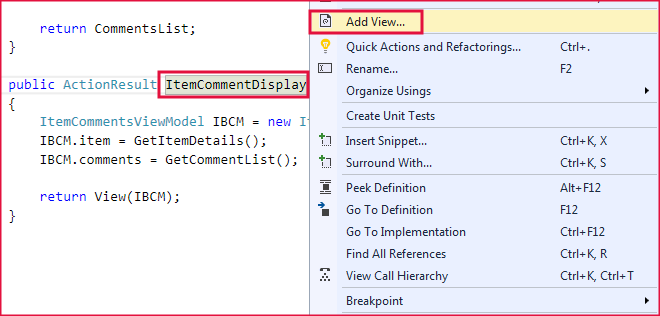
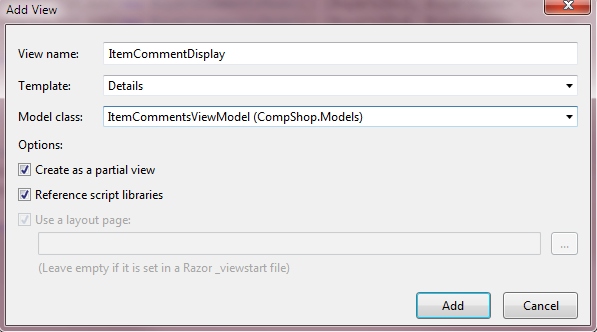
Step 4: Set the value as this picture below and click Add:
Step 5: Now, go to Views ItemComments
ItemCommentDisplay.cshtml and Add the following code.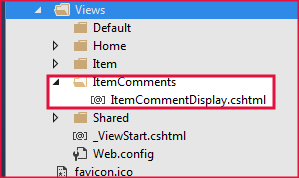
@model CompShop.Models.ItemCommentsViewModel
<div>
<h4>Buyers Comments</h4>
<hr />
<dl class="dl-horizontal">
</dl>
</div>
<p>
<!-- ITEM DETAILS -->
<div style="background-color:burlywood; padding:5px;">
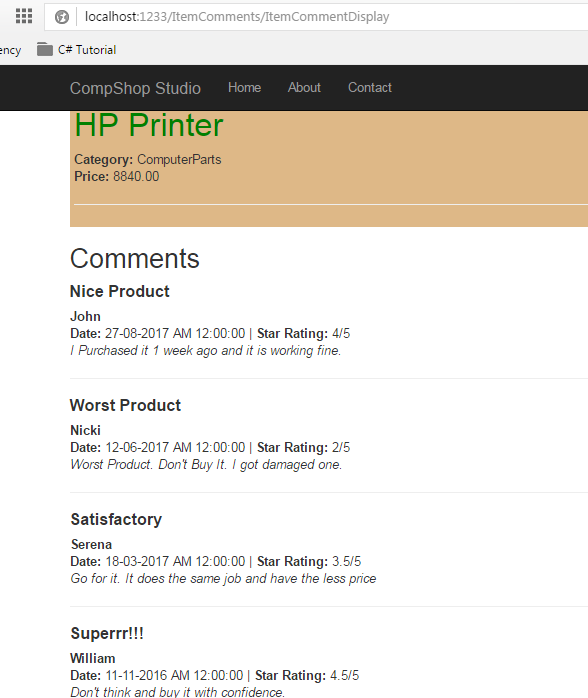
<h1 style="color:green">@Html.DisplayFor(i => i.item.Name)</h1>
<b>Category:</b> @Html.DisplayFor(i => i.item.Category)<br />
<b>Price:</b> @Html.DisplayFor(i => i.item.Price)
<hr />
</div>
<!-- LOADING COMMENTS -->
<h2>Comments</h2>
@foreach (var comments in Model.comments)
{
<h4><b>@comments.CommentsTitle</b></h4>
<b>@comments.BuyersName</b><br />
<b>Date:</b> @comments.Date <span>|</span>
<b>Star Rating: </b>@comments.StarRating<span>/5</span>
<br />
<i>@comments.Comments</i>
<hr />
}
</p>
Step 6: Press F5 to run this program and navigate to following link to see the output.
http://localhost:1233/ItemComments/ItemCommentDisplay
Summary
In this chapter, I have tried to teach you View Model using the simple program. As an ASP.NET MVC Developer, you will always use View Model to display multiple model data in single view pages.