1. How to Create Master Page Layout in ASP.NET MVC5
2. Step by Step guide in creating Master Page
3. How to change Default Layout.
In the previous chapter, you learned how to add view pages in ASP.NET MVC 5. In this chapter, I will explain how to give your site a consistent look by creating a master page layout. When you browse any website, you would have been noticed that the look and feel of the websites are consistent with all their pages and only content gets changed. Like Header, Side Menu, Footer, and sidebar are almost same in all pages and only the middle content area gets changed.
In this article, I will explain step by step pictorial guide to creating a master page layout in asp.net MVC 5.
Here, I am using CompShop application which I have created in the Previous Chapter. If you have directly reached here then either create a new ASP.NET MVC 5 Project or check my previous article.
_YourLayout.cshtml page in Shared folder and insert placeholder for the area that you want to make dynamic. How! Here are the steps.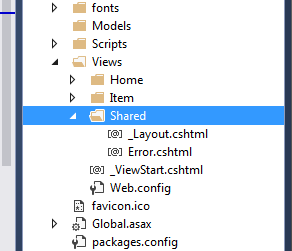
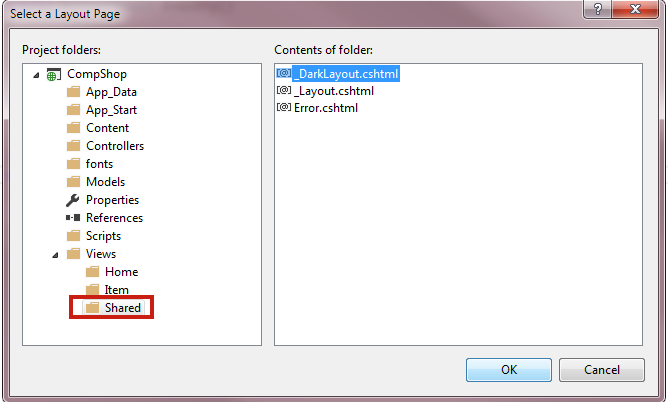
_Layout.cshtml and Error.cshtml. Here, I will create my own _DarkLayout.cshtml. Right click on Shared folder Add MVC 5 Layout Page (Razor).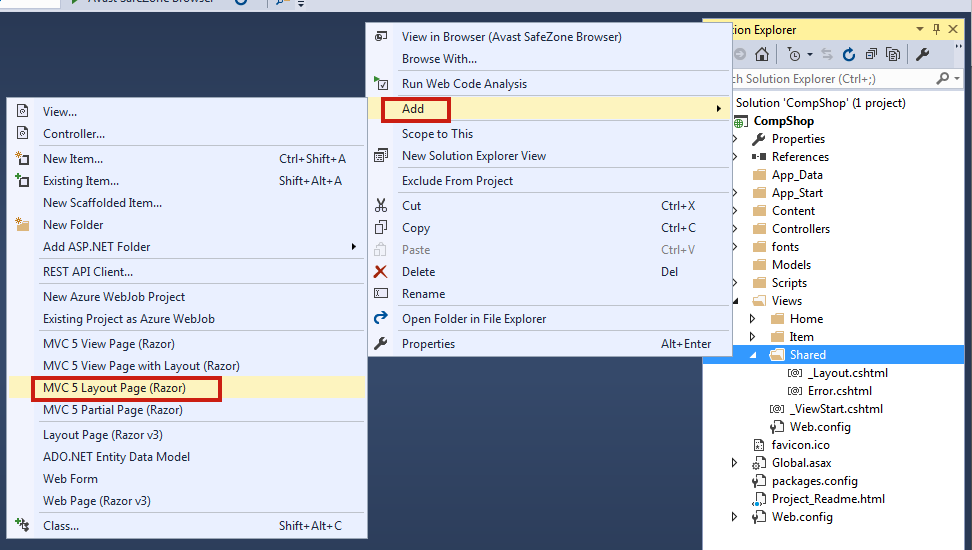
_DarkLayout and click OK.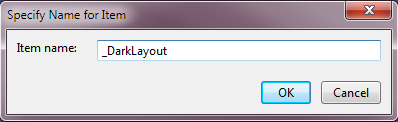
_DarkLayout.cshtml page and paste the following designed code.<!DOCTYPE html>
<html>
<head>
<meta name="viewport" content="width=device-width" />
<title>@ViewBag.Title</title>
</head>
<body style="background-color:burlywood">
<!-- Header -->
<header>
<h1 style="text-align:center; color:bisque">My Dark Layout Page</h1>
</header>
<!-- End of Header -->
<!-- Left Sidebar -->
<nav>
<h3>Navigation</h3>
@Html.ActionLink("About","About");<br />
@Html.ActionLink("Contact", "Contact");<br />
@Html.ActionLink("Enquiry", "Enquiry");<br />
@Html.ActionLink("Home", "Home");<br />
@Html.ActionLink("Purchase", "Purchase");<br />
</nav>
<!-- End of Left Sidebar -->
<!-- Content Body -->
<div class="content">
@RenderBody()
</div>
<!-- End of Content Body -->
<!-- Footer -->
<footer>
<h4>I am Footer.</h4>
</footer>
<!-- Style -->
<style>
header {
height: 100px;
width: 100%;
background-color: red;
}
nav {
float: left;
width: 200px;
height: 250px;
background-color: darkgoldenrod;
}
.content {
background-color: aliceblue;
padding: 20px;
}
footer {
background-color: green;
width: 100%;
height: 50px;
float: right;
text-align: center;
}
</style>
</body>
</html>
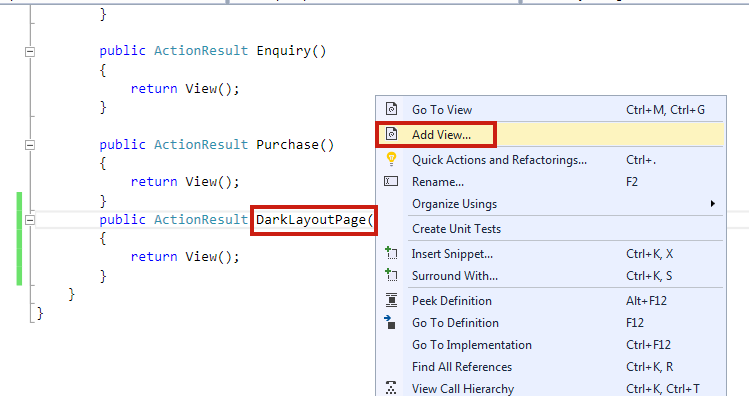
HomeController.cs and add following code to add view page.public ActionResult DarkLayoutPage()
{
return View();
}
DarkLayoutPage and Select Empty Template as picture below. Select Use a layout page checkbox and click on browse button.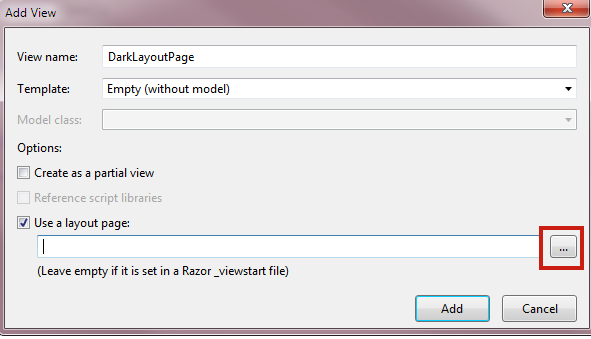
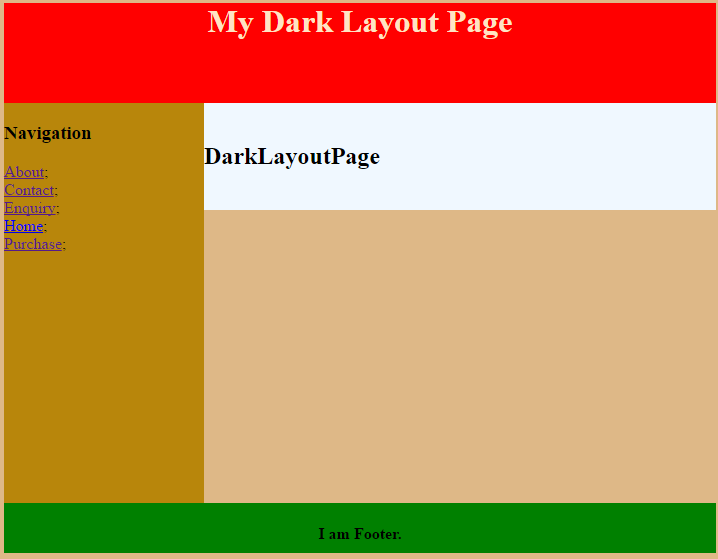
When you add content in DarkLayoutPage View page, it will show in the content area and the header, footer, and sidebar design would be same. You can create many Layout pages in a shared folder.
If you want to add this layout to another page that is already created then add the following code at the top of the page.
@{
        Layout = "~/Views/Shared/_DarkLayout.cshtml";
}
Let’s Understand the Code
There is nothing to understand in the previous code. Just design your page layout in Shared folder and insert placeholder @RenderBody() to inject content from child page. It is a pretty basic chapter, which I have kept easy and small. In the next chapter, I will discuss about more advanced section @RenderBody, @RenderPage and @RenderSection.
In order to change the default layout page do the following steps.
1. Open Solution Explorer Views _ViewStart.cshtml.
2. Change your Layout name here.
@{
    Layout = "~/Views/Shared/_Layout.cshtml";
}
Create Master Page using downloaded HTML/CSS Template
You can also take help in creating master page from this awesome step by step article. This article explains how to use and apply external css theme into master page design.