1. How to Access Database and Tables using Model without Entity Framework 6?
2. How to Insert, Update and Delete from Tables without Entity Framework?
As I mentioned earlier, that Entity Framework is a very powerful tool for database management that allows you to insert, update and delete in the database easily but it is very heavy and limits developer control. Without Entity Framework, you have all the things in your hand and have complete control on your code. In this chapter, I will tell you how can you communicate with the database and Insert, Update and Delete record without using Entity Framework. However, In the next chapter, I will teach you the same thing but using Entity Framework. In the previous chapter, you learned how to add a Model and access data in Views. Let’s move to more advanced topic now.
Content of this Chapter:
1. Create or Open a Project2. Create a Database and Table
3. Add Connection String to Web.Config file
4. Create Model for Database and Table
5. Create a Class to Handle Query
6. Create Controllers
7. Create Views
8. Run your Project
1. Create or Open a Project
I have created already a Project CompShop earlier. If you haven't created or landed first time on this page then don't worry and Create a New ASP.NET MVC 5 Project in Visual Studio now. I tried to make each chapter complete and independent so you can start right now from this chapter.
2. Create a Database and Table
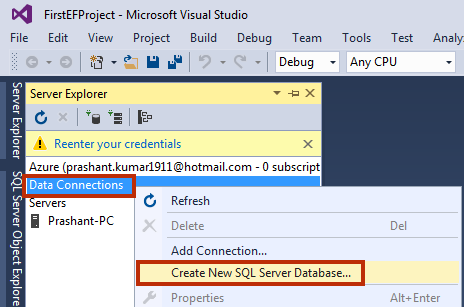
Now, we will create a Database and a Table. This table will be used for storing, editing and deleting records. Either you can create database in SQL Server Management Studio or Visual Studio Server Explorer. Here, I will create database and table in Visual Studio Server Explorer. Here are the complete steps.
1. Create Database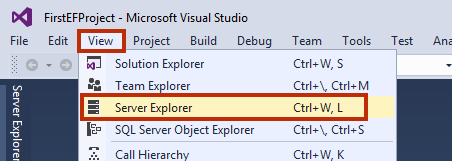 View - Server Explorer
.\SQLExpress and Database name as CompShopDBwithoutEF and click OK.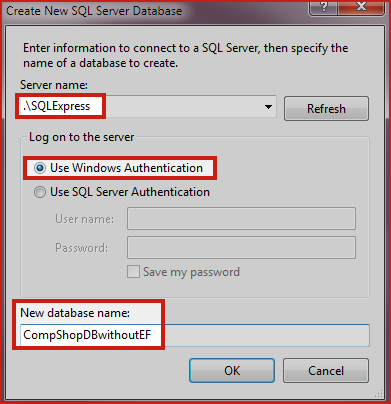
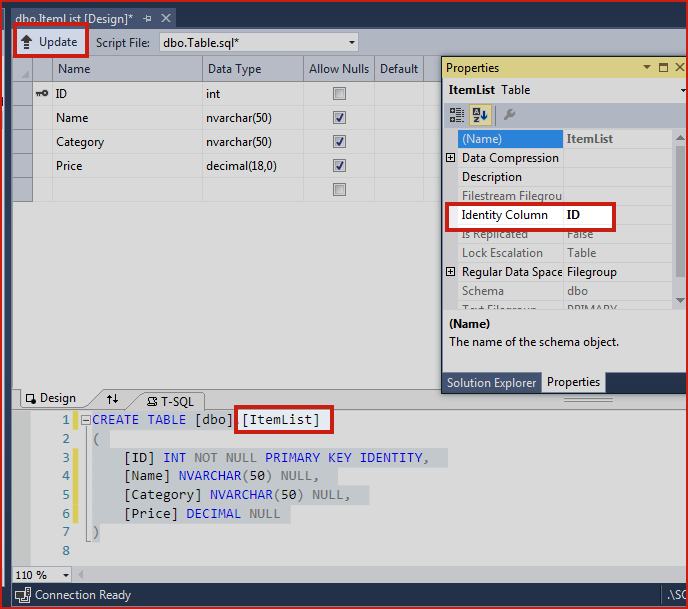
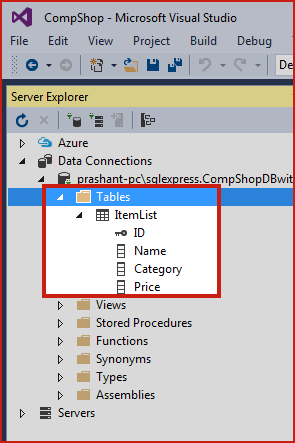
b. Create Table
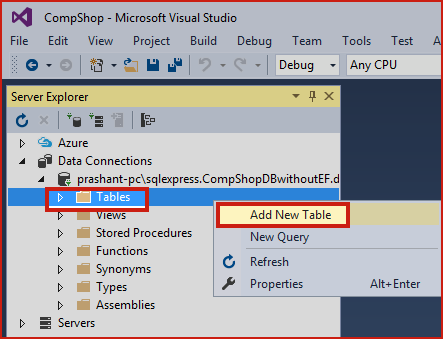
ItemList in the database.Script
CREATE TABLE [dbo].[ItemList]
(
	[ID] INT NOT NULL PRIMARY KEY IDENTITY,
    [Name] NVARCHAR(50) NULL,
    [Category] NVARCHAR(50) NULL,
    [Price] DECIMAL NULL
)
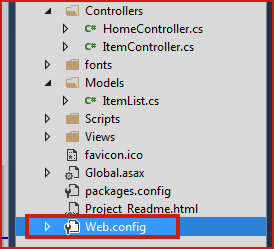
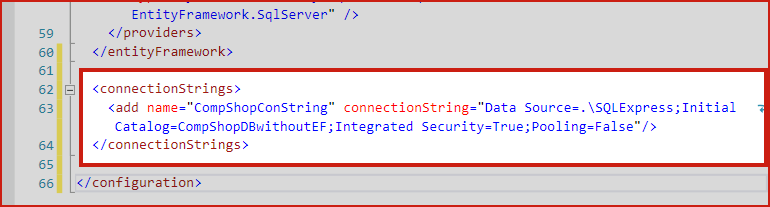
3. Add Connection String in Web.config file
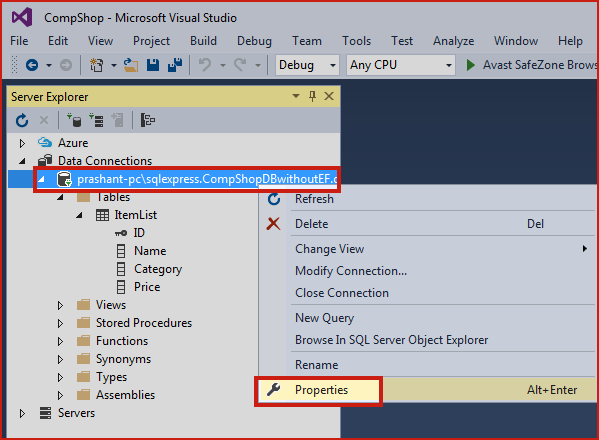
Code:
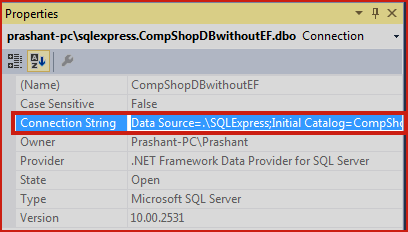
  <connectionStrings>
    <add name="CompShopConString" connectionString="Data Source=.\SQLExpress;Initial Catalog=CompShopDBwithoutEF;Integrated Security=True;Pooling=False"/>
  </connectionStrings>
4. Create Model Class
Now, the next step is to creating model for ItemList Table. Here is the steps.
ItemModel.cs class in Model. Right click on Model Add Class…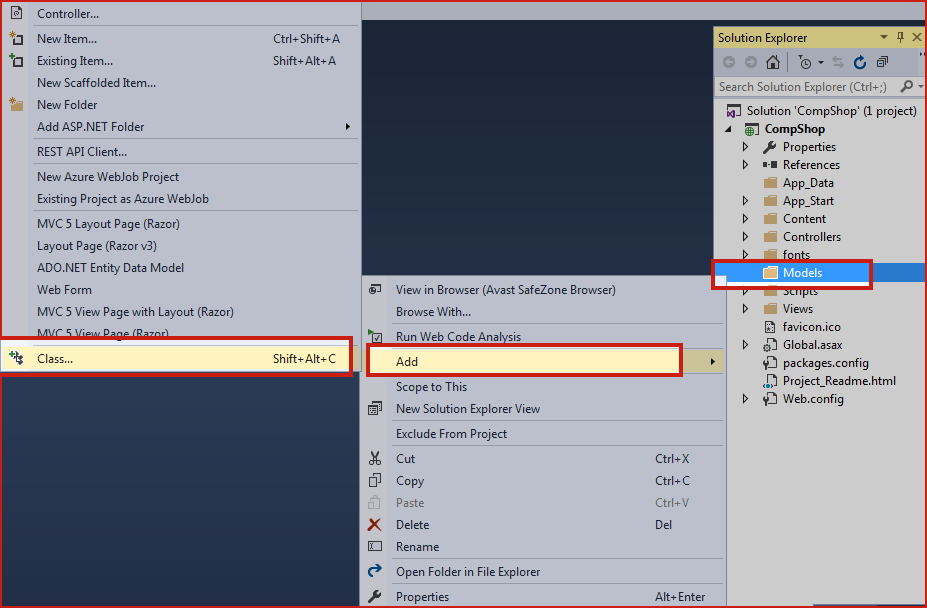
namespace CompShop.Models
{
    public class ItemModel
    {
        public int ID { get; set; }
        public string Name { get; set; }
        public string Category { get; set; }
        public decimal Price { get; set; }
    }
}
5. Create an ItemDBHandler.cs Class to Handle Database Query
Here, I am going to create a class that will handle all the database related query as insert, update and delete. Model will use this class to make a connection with database and process record.
ItemDBHandler.cs class in Model folder. Right click on Model Add Class. Add the following code in ItemDBHandler.cs class.Code:
using System;
using System.Collections.Generic;
using System.Data;
using System.Data.SqlClient;
using System.Configuration;

namespace CompShop.Models
{
    public class ItemDBHandler
    {
        private SqlConnection con;
        private void connection()
        {
            string constring = ConfigurationManager.ConnectionStrings["CompShopConString"].ToString();
            con = new SqlConnection(constring);
        }

        // 1. ********** Insert Item **********
        public bool InsertItem(ItemModel iList)
        {
            connection();
            string query = "INSERT INTO ItemList VALUES('" + iList.Name + "','" + iList.Category + "'," + iList.Price + ")";
            SqlCommand cmd = new SqlCommand(query,con);
            con.Open();
            int i = cmd.ExecuteNonQuery();
            con.Close();

            if (i >= 1)
                return true;
            else
                return false;
        }

        // 2. ********** Get All Item List **********
        public List<ItemModel> GetItemList()
        {
            connection();
            List<ItemModel> iList = new List<ItemModel>();

            string query = "SELECT * FROM ItemList";
            SqlCommand cmd = new SqlCommand(query, con);
            SqlDataAdapter adapter = new SqlDataAdapter(cmd);
            DataTable dt = new DataTable();

            con.Open();
            adapter.Fill(dt);
            con.Close();

            foreach(DataRow dr in dt.Rows)
            {
                iList.Add(new ItemModel
                {
                    ID = Convert.ToInt32(dr["ID"]),
                    Name = Convert.ToString(dr["Name"]),
                    Category = Convert.ToString(dr["Category"]),
                    Price = Convert.ToDecimal(dr["Price"])
                });
            }
            return iList;
        }

        // 3. ********** Update Item Details **********
        public bool UpdateItem(ItemModel iList)
        {
            connection();
            string query = "UPDATE ItemList SET Name = '"+iList.Name+"', Category = '"+iList.Category+"', Price = "+iList.Price+" WHERE ID = "+iList.ID;
            SqlCommand cmd = new SqlCommand(query, con);
            con.Open();
            int i = cmd.ExecuteNonQuery();
            con.Close();

            if (i >= 1)
                return true;
            else
                return false;
        }

        // 4. ********** Delete Item **********
        public bool DeleteItem(int id)
        {
            connection();
            string query = "DELETE FROM ItemList WHERE ID = " + id;
            SqlCommand cmd = new SqlCommand(query, con);
            con.Open();
            int i = cmd.ExecuteNonQuery();
            con.Close();

            if (i >= 1)
                return true;
            else
                return false;
        }
    }
}
These are the very basic ADO.NET code and you can understand it easily. If you are having a problem in ADO.NET then you can take a quick look or learn complete ADO.NET here.
6. Create a Controller : ItemController.cs
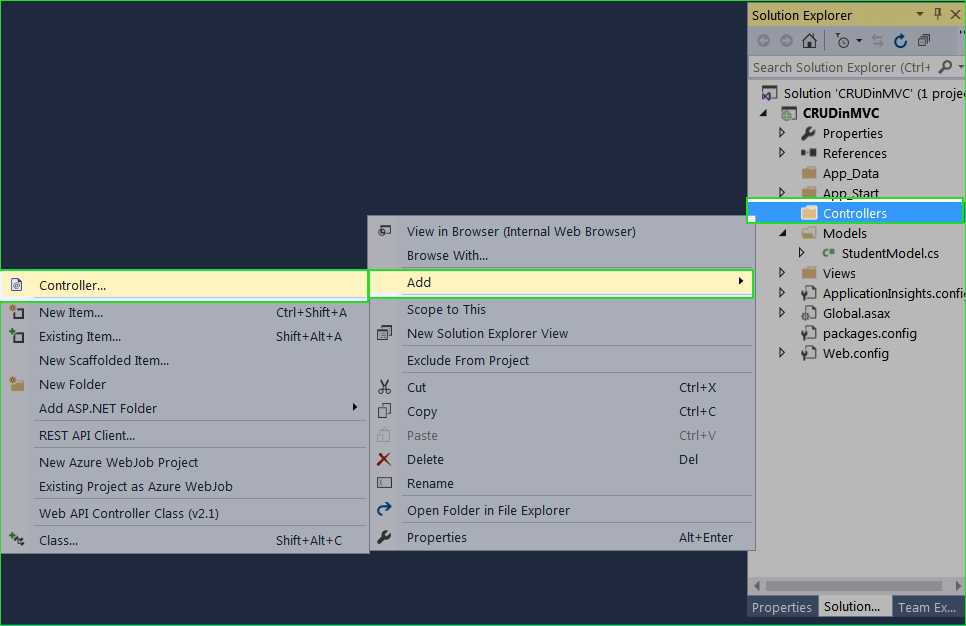
ItemController and click Add.ItemController.csusing System.Collections.Generic;
using System.Web.Mvc;
using CompShop.Models;
namespace CompShop.Controllers
{
public class ItemController : Controller
{
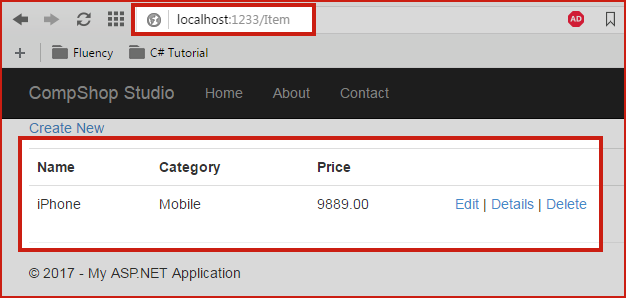
// 1. *********** Display All Item List in Index Page ***********
public ActionResult Index()
{
ViewBag.ItemList = "Computer Shop Item List Page";
ItemDBHandler IHandler = new ItemDBHandler();
ModelState.Clear();
return View(IHandler.GetItemList());
}
// 2. *********** Add New Item ***********
[HttpGet]
public ActionResult Create()
{
return View();
}
[HttpPost]
public ActionResult Create(ItemModel iList)
{
// try
//{
if(ModelState.IsValid)
{
ItemDBHandler ItemHandler = new ItemDBHandler();
if(ItemHandler.InsertItem(iList))
{
ViewBag.Message = "Item Added Successfully";
ModelState.Clear();
}
}
return View();
/* }
catch { return View(); }*/
}
// 3. *********** Update Item Details ***********
[HttpGet]
public ActionResult Edit(int id)
{
ItemDBHandler ItemHandler = new ItemDBHandler();
return View(ItemHandler.GetItemList().Find(itemmodel => itemmodel.ID == id));
}
[HttpPost]
public ActionResult Edit(int id, ItemModel iList)
{
try
{
ItemDBHandler ItemHandler = new ItemDBHandler();
ItemHandler.UpdateItem(iList);
return RedirectToAction("Index");
}
catch { return View(); }
}
// 4. *********** Delete Item Details ***********
public ActionResult Delete(int id)
{
try
{
ItemDBHandler ItemHandler = new ItemDBHandler();
if(ItemHandler.DeleteItem(id))
{
ViewBag.AlertMsg = "Item Deleted Successfully";
}
return RedirectToAction("Index");
}
catch { return View(); }
}
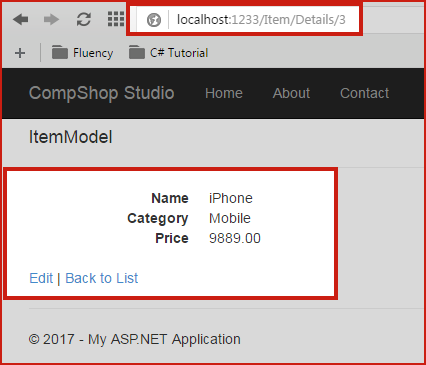
public ActionResult Details(int id)
{
ItemDBHandler ItemHandler = new ItemDBHandler();
return View(ItemHandler.GetItemList().Find(itemmodel => itemmodel.ID == id));
}
}
}
Let’s take a moment to understand this code
Honestly, nothing special in this code. I have used Model class ItemModel to access data or store data. ItemModel class uses ItemDBHandler class for processing the database related job. I have written all the database related code in ItemDBHandler.cs class.
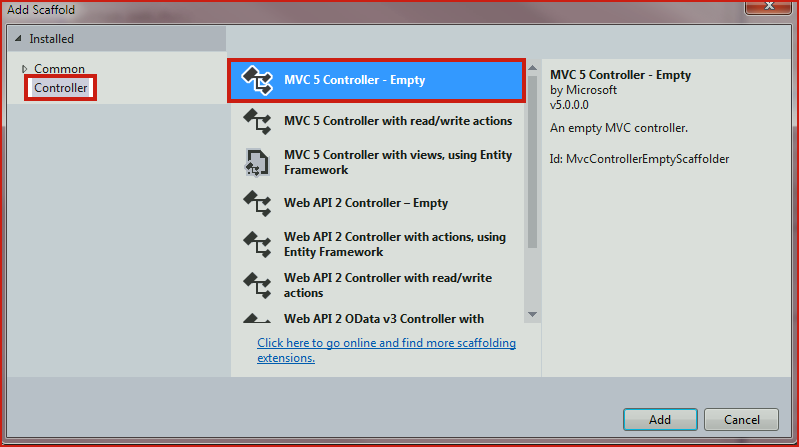
7. Add View Pages from Controller’s Action Method.
Now, this time is to adding view pages for all the action methods from ItemController. It is very easy, just look how.
Index() Action Method then select Add View…
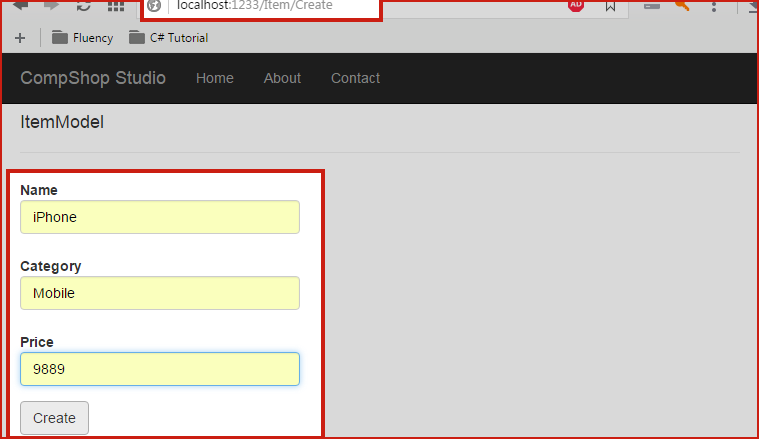
Create(), Edit(), Delete() and Details() action method.Create()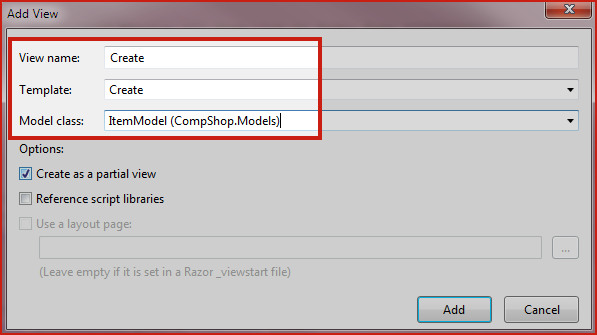
Edit()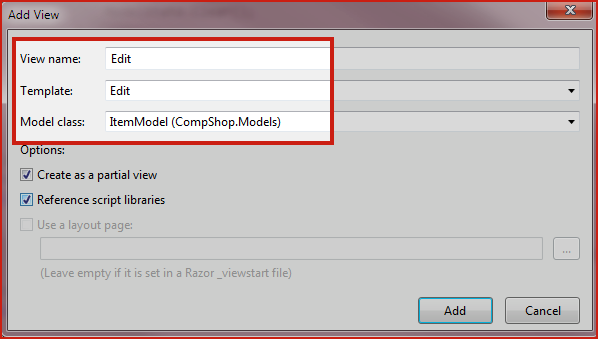
Delete()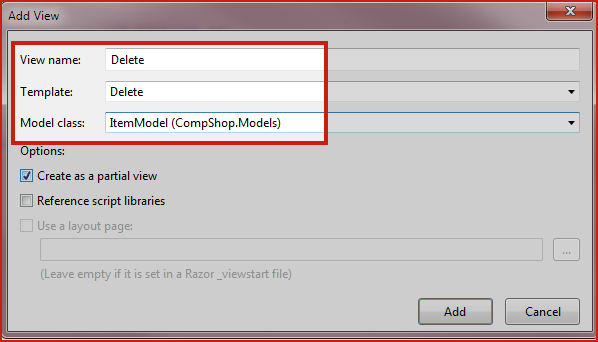
Details()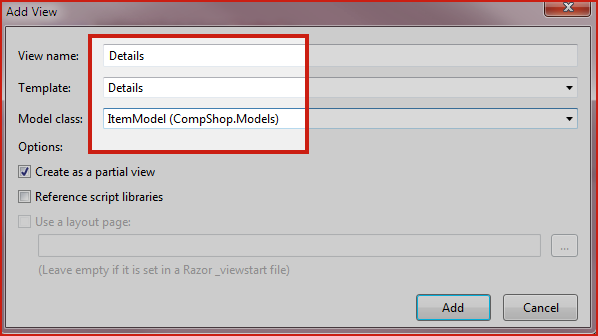
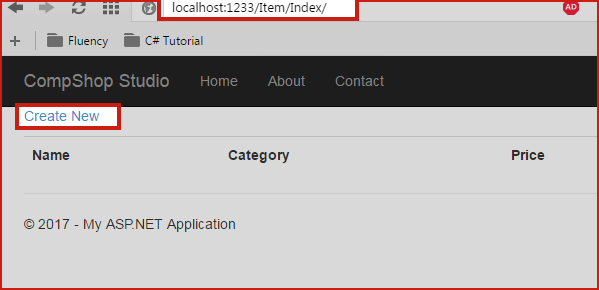
8. Run your Project
Press F5 to Run your project and navigate to following link
http://localhost:1233/Item/Index/
Summary:
In this chapter, you learned how can you use Model for Inserting, Updating and Deleting record from database table. You must make a Database Handler class along with Model because Model depends on this handler class. It is known as best practices and when you develop your project systematically. It would be easier to understand your code later. When Controllers needs any information from the database it looks into model and model call DB Handler class and gather information and then return value to the controller. I think this chapter is complete explanatory and you have understood it clearly.
This chapter uses clean ADO.NET Code to connect to Database. In the next chapter, you will make this same project again but this time I will introduce you to Entity Framework 6. You will see that how Entity Framework makes Database Part easier. In the next chapter, you will learn Insert, Update and Delete in ASP.NET MVC 5 using Entity Framework 6.
More Similar ArticlesInsert Update Delete In ASP.NET MVC 5 Without Entity Framework [Using Stored Procedure]