1. Basics of Visual Studio IDE
Following parts of visual studio you need to understand before starting your first ASP.NET MVC 5 Project.
- Sign-in Visual Studio
- Creating New Project
- Visual Studio IDE
- Main Window Space
- Solution Explorer
- Properties Window
- Server Explorer
- ToolBox
- Error Window
- Smart Features
- Refactoring
- Navigate
- Code Lens
- Light Bulbs
- IntelliSense
- Bookmarks
- Compiling and Building your code
Visual Studio is very powerful software development IDE which enables you to develop web-based, windows based and mobile-based apps with ease and drag-drop facility. It minimizes your efforts and does most of the background coding automatically for you. In order to properly use of Visual Studio 2015 or 2017, you need to read this chapter carefully.
SIGN-in visual studio
If you are opening visual studio 2015 or 2017 first time then you need to sign-in first with your Hotmail account. You can sign into visual studio as follows:
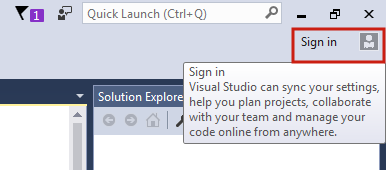
1. Open Visual Studio2. Click on the Sign in icon. It is Top Right Corner of the visual studio.
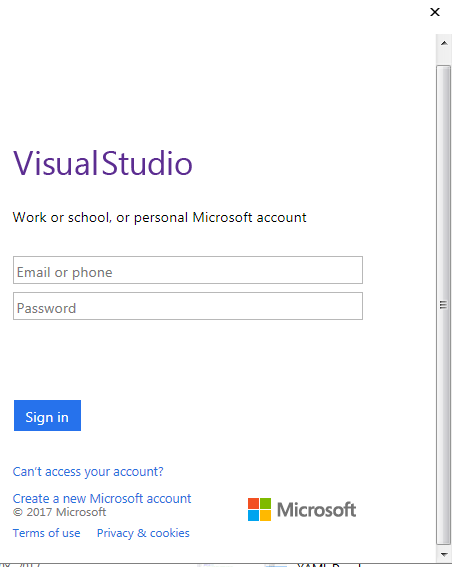
3. A Login pop up window will open. Sign in here from your Microsoft account or Hotmail account. If you haven't Hotmail account then create a new one.
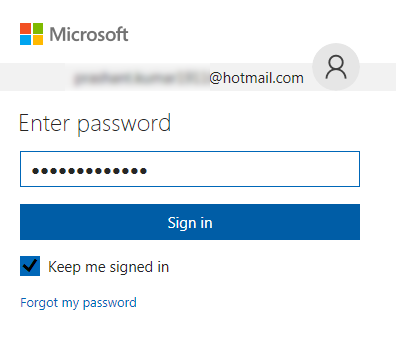
4. After entering Your Hotmail id and password click on to Sign in button to login in visual studio. Make sure to select Keep me signed in check box.
Create New ASP.NET MVC 5 Project
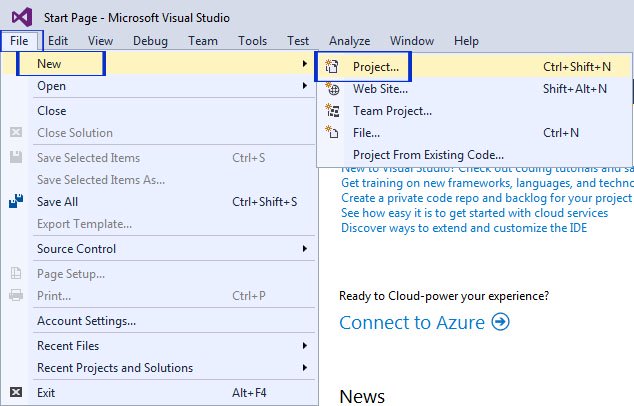
1. Launch Visual Studio2. Go to File New Project.
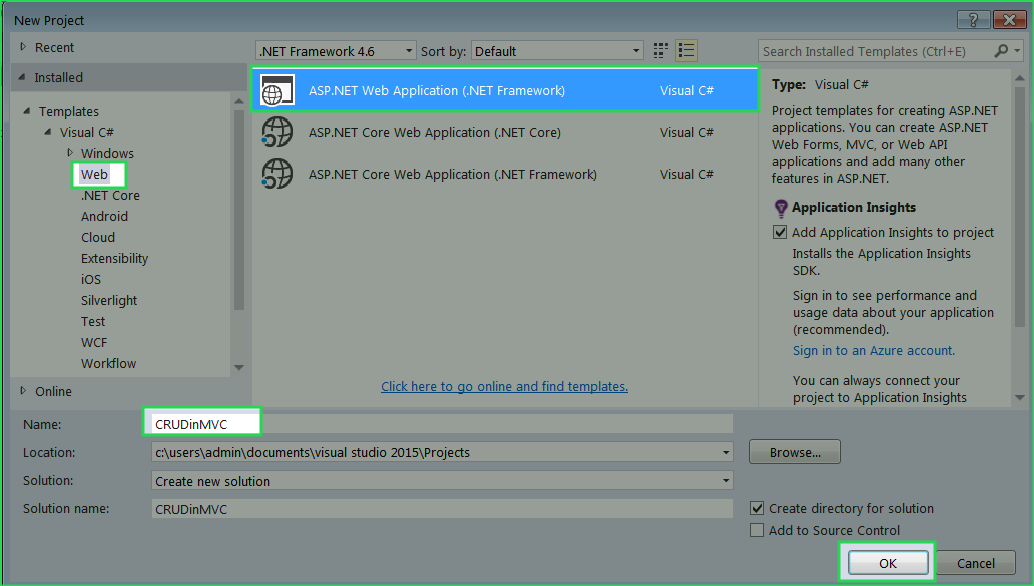
3. Select Template Visual C# Web in left panel and then select ASP.NET Web Application (.NET Framework) in middle Panel. Give Project Name and click OK.
4. In the next window, select MVC Template and change Authentication to No Authentication. Click OK.
5. Your ASP.NET MVC 5 Project is open now.
Understand Visual Studio IDE
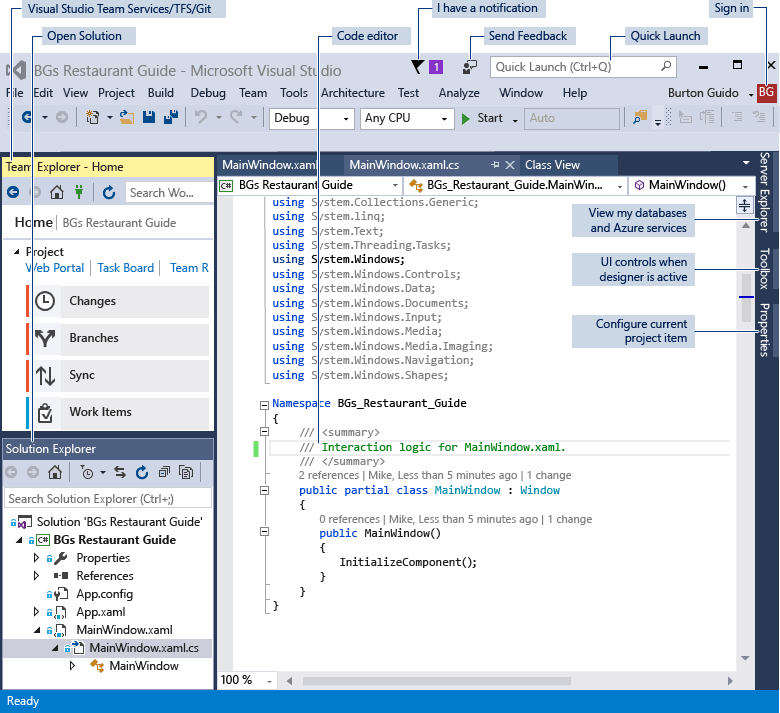 Main Window Space: This space is used for coding.
Solution Explorer: It shows lists of all the files and reference of the projects.
Properties Window: It shows all the available property of controls, class or objects.
Server Explorer: It allows you to connect with server and database right from the visual studio.
Object Explorer: It allows you to explore databases and tables.
ToolBox: It contains all the available controls that can be dragged and dropped into your project.
Error Window: This window keeps list of all the shown errors.
Visual Studio Smart Features
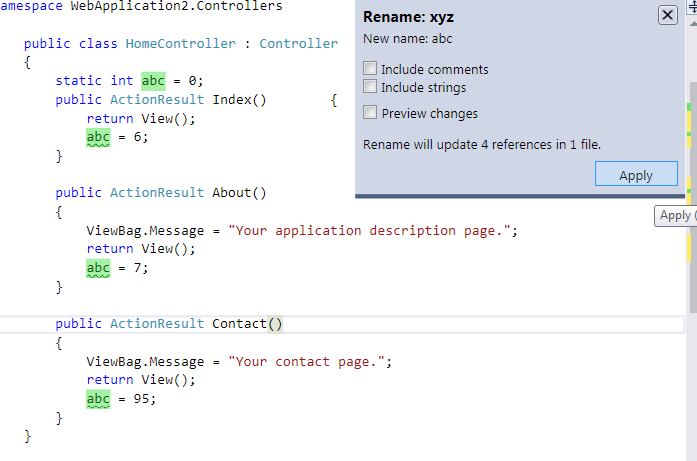
RefactoringRefactoring is a process of renaming variables, classes or objects with ease. For example, if you have used variable multiple time and suddenly need to rename that variables, just rename one variable and Visual Studio Refactoring take care of renaming all the same variables automatically.
1. Right click on variable name and select Rename2. Now, delete xyz and type abc. You will see that all the xyz variables started automatically renaming with abc. Press Enter or click to Apply button to Confirm.
Navigate Navigate box allows you to easily access classes, objects, variables or members.

Code Lens
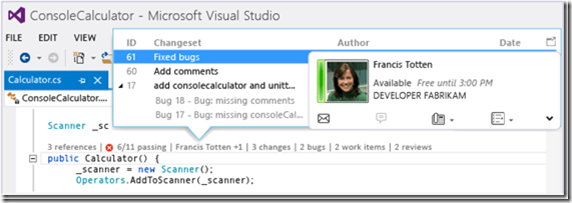
Code Lens allows you to find references and changes the history of codes. It also shows you linked bug, code reviews, and unit tests. Code lens is very useful when you work with a team and someone changes the codes. Code Lens allows you to contact the team right from the explorer without leaving the editor. It tells you about the person who last modified the methods.
Code Lens are only available in VS Enterprise Edition and VS Professional Edition. It is not available with VS Community Edition.
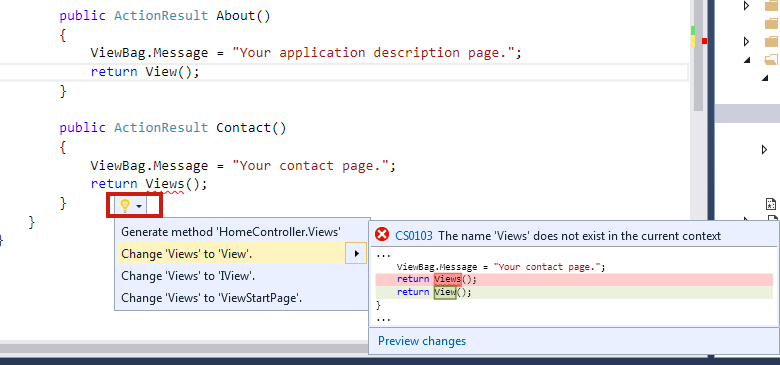
Light Bulbs
Light Bulbs are useful tools that popup automatically if your code has error. It tells you to fix common coding issue and also shows you suggestion to fix it.
Here, in this example, I made a simple mistake and write Views() instead of View(). When you will hover on error you will see the pop up light bulb suggestion to fix it.
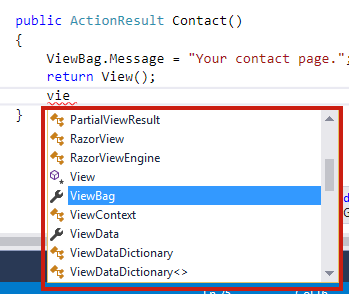
IntelliSense
IntelliSense provides you live assistance to your code. Believe me, IntelliSense is one of the most beautiful features of visual studio that allows you to write codes with confidence. When you write code, IntelliSense automatically shows the next word suggestion with autocomplete. It makes your codes error free, accurate and speedy.
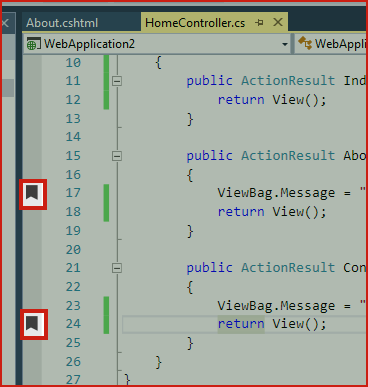
BookMark
Bookmark is a very useful feature which allows you to quickly navigate between open documents, directly to your block of code. Just bookmark the line of code where you are working currently and navigate between them easily.
1. In order to bookmark a line, go to the line and press CTRL + KK. It will bookmark the line. To navigate between marked line pressCTRL + BP : Previous BookMark
CTRL + BN: Next Bookmark
CTRL + BC: Clear Bookmark
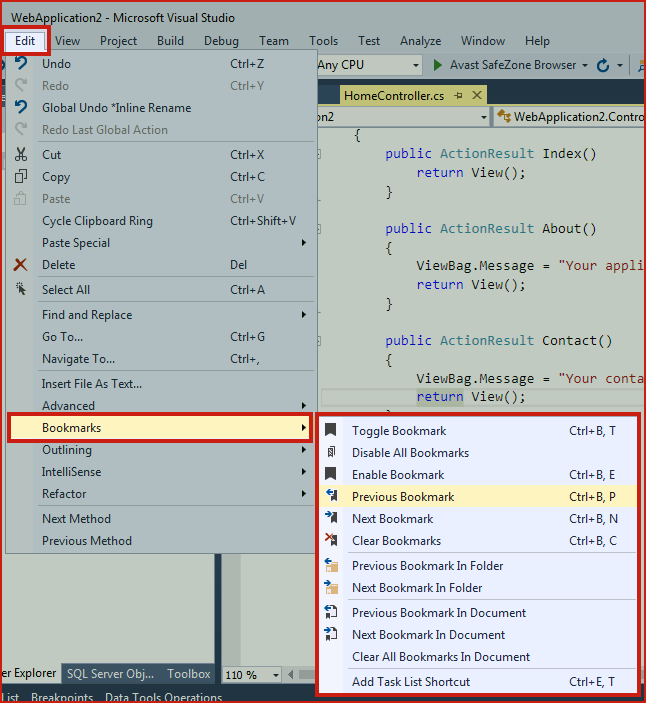
2. You can find all the bookmarking option at here. Go to Edit Bookmark.
Compiling and Building your Code
Compiling and Building your code as follows:
1. Press CTRL + SHIFT + B to build your Project.
2. Press F6 to build your Project
3. Alternatively you can go to Build
Build Solution to build your Project.
Debugging is a process of finding bugs/errors in your program. It executes your project and inspects each step in the execution. If any bug found, it breaks the execution and allows you to correct the errors. It is very useful when you want to test your project against errors and bugs. You can debug your project as follows:
1. Press F5 to Debug or Run the Project.2. Alternatively, you can go to Debug Start Debugging
3. You can also run your project without debugging. Press CTRL + F5 to start without debugging.
Break Execution or Debugging
Press SHIFT + F5 to break execution of program.
BreakPoint
BreakPoint is a very useful feature that enables you to analyze the block of code when debugging. It shows the live execution of your code block.
1. Right click on code block and select BreakPoint Insert BreakPoint.
2. You will see that a red circle mark is appeared before the code.3. Press F5 to debug your program. When your program reaches onto the breakpoint it will show you step by step execution of the code block. Press F5 for continue or move next.
Summary
In this chapter, you learned about Visual Studio IDE in details. You also understand the basic features of this powerful IDE. Apart from it, you learned how to use VS IDE for developing and debugging your project. In the next chapter, you will create your First Demo ASP.NET MVC5 Project.