1. What is Data Annotation in ASP.NET MVC?
2. Client Side Validation in MVC
3. How to apply client side validation in ASP.NET MVC using Data Annotation
What is Data Annotation?
Validating user input is not only necessary but it is compulsory these days. Data Annotation provides instant user input checking facility at client side and provides to asp developer, a wide range of validator attributes. Data Annotation makes the validating process easy and quick.
Data Annotation attributes directly applies to Model class member and those members are bounded to accept valid user input according to Data Annotation Rule.
Data Annotation can be used after adding following namespace.
System.ComponentModel.DataAnnotations
using System.ComponentModel;
Data Annotation Attributes
Here, is a list of some important Data Annotation Attributes.
Example:
[Required(ErrorMessage = "Name is Required")]
public string Name { get; set; }Example:
[DisplayName("Enter Your Name: ")]
public string Name { get; set; }
Example:
[StringLength(50, MinimumLength = 3)]
public string Name { get; set; }Example:
[Range(1,120, ErrorMessage ="Age must be between 1-120 in years.")]
public int Age { get; set; }Example:
[Bind(Exclude = "Id")]
Example:
[ScaffoldColumn(false)]
public int Id { get; set; }Example:
[DisplayFormat(DataFormatString = "{0:dd/MM/yyyy hh:mm:ss tt}")]
public System.DateTime? HireDate { get; set; }Example:
[ReadOnly(true)]
public string Name { get; private set; }Example:
[MaxLength(50)]
public string Name { get; set; }Example:
[DataType(DataType.CreditCard)]
public string Name { get; set; }Example:
[System.ComponentModel.DataAnnotations.Compare("Email", ErrorMessage = "Email Not Matched")]
public string ConfirmEmail { get; set; }Example:
[Required(ErrorMessage = "Email ID is Required")]
[DataType(DataType.EmailAddress)]
[MaxLength(50)]
[RegularExpression(@ "[a-z0-9._%+-]+@[a-z0-9.-]+\.[a-z]{2,4}", ErrorMessage = "Incorrect Email Format")]
public string Email { get; set;}Example:
[DataType(DataType.PhoneNumber)]
[RegularExpression(@"^\(?([0-9]{2})[-. ]?([0-9]{4})[-. ]?([0-9]{3})[-. ]?([0-9]{3})$", ErrorMessage = "Not a valid Phone number")]
public string Name { get; set; }
Output format: 91-1234-567-890
Example:
[Url][Required]
public string URL { get; set; }Example:
[RegularExpression(@"[a-z0-9._%+-]+@[a-z0-9.-]+\.[a-z]{2,4}", ErrorMessage = "Incorrect Email Format")]
public string Email { get; set; }
Example:
[DataType(DataType.EmailAddress)]
public string Email { get; set; }Example:
[System.Web.Mvc.HiddenInput(DisplayValue = false)]
public string Name { get; set; }
Complete Programming Example
Let’s understand all these with complete programming example.
StudentModel.csusing System.ComponentModel.DataAnnotations;
using System.ComponentModel;
using System.Web.Mvc;
namespace FormValidation.Models
{
[Bind(Exclude = "Id")]
public class StudentModel
{
[ScaffoldColumn(false)]
public int Id { get; set; }
[Required(ErrorMessage = "Name is Required")]
[StringLength(50,MinimumLength =3)]
 public string Name { get; set; }
[Required(ErrorMessage ="Email ID is Required")]
[DataType(DataType.EmailAddress)]
[MaxLength(50)]
[RegularExpression(@"[a-z0-9._%+-]+@[a-z0-9.-]+\.[a-z]{2,4}", ErrorMessage = "Incorrect Email Format")]
public string Email { get; set; }
[Required(ErrorMessage ="Confirm Email is Required")]
[DataType(DataType.EmailAddress)]
[System.ComponentModel.DataAnnotations.Compare("Email", ErrorMessage = "Email Not Matched")]
public string ConfirmEmail { get; set; }
[Required(ErrorMessage ="Age is Required")]
[Range(1,120, ErrorMessage ="Age must be between 1-120 in years.")]
public int Age { get; set; }
}
}
Index.cshtml page.@{
ViewBag.Title = "Home Page - Student Details";
}
<script src="~/Scripts/jquery.validate.min.js"></script>
<script src="~/Scripts/jquery-1.10.2.min.js"></script>
@model FormValidation.Models.StudentModel
<h2>Student Details</h2>
@using (Html.BeginForm("StudentDetails", "Home", FormMethod.Post))
{
<ol>
<li>
@Html.LabelFor(m => m.Name)
@Html.TextBoxFor(m => m.Name)
@Html.ValidationMessageFor(m => m.Name)
</li>
<li>
@Html.LabelFor(m => m.Email)
@Html.TextBoxFor(m => m.Email)
@Html.ValidationMessageFor(m => m.Email)
</li>
<li>
@Html.LabelFor(m => m.ConfirmEmail)
@Html.TextBoxFor(m => m.ConfirmEmail)
@Html.ValidationMessageFor(m => m.ConfirmEmail)
</li>
<li>
@Html.LabelFor(m => m.Age)
@Html.TextBoxFor(m => m.Age)
@Html.ValidationMessageFor(m => m.Age)
</li>
</ol>
<input type="submit" value="Save Student Details" />
}
<h3 style="color:green">Student Details</h3>
<h4 style="color:green">
<b>Name: @ViewBag.name<br />
Email: @ViewBag.email<br />
Age: @ViewBag.age</b>
</h4>HomeController.cs[HttpPost]
public ActionResult StudentDetails(StudentModel sm)
{
if (ModelState.IsValid)
{
ViewBag.name = sm.Name;
ViewBag.email = sm.Email;
ViewBag.age = sm.Age;
return View("Index");
}
else
{
ViewBag.name = "No Data";
ViewBag.email = "No Data";
ViewBag.age = "No Data";
return View("Index");
}
}
Let's understand this code:
1. I have added several data annotation attributes to model properly.
[Required(ErrorMessage = "Name is Required")]
[StringLength(50,MinimumLength =3)]
public string Name { get; set; }2. Creation of form is same and nothing changed.
Custom Validation using Data Annotation
Till now, you learned how to use predefined Data Annotation attribute to validate input field. But, what is the way of adding a custom rule in data annotation? Here, I will explain how can, you add your own custom validation rule to Data Annotation.
For example, you want to create a custom attribute MinAgeAttribute(), in which user is forced to enter their age 18 or more than 18. This is just an example and after knowing that method of adding a custom attribute in data annotation, you can feed your own rules.
MinAgeAttribute.cs in this folder.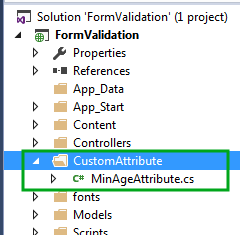
MinAgeAttribute.cs classusing System.ComponentModel.DataAnnotations;
namespace FormValidation.CustomAttribute
{
public class MinAgeAttribute : ValidationAttribute
{
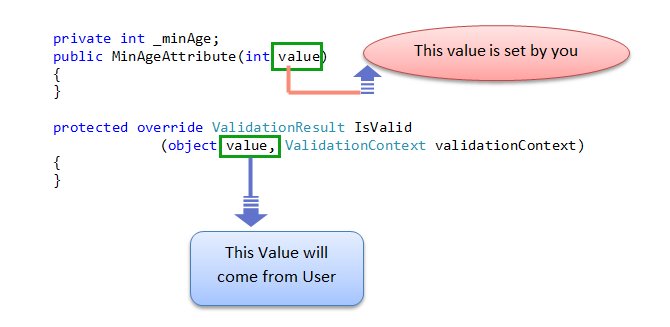
private int _minAge;
public MinAgeAttribute(int value)
{
_minAge = value;
}
protected override ValidationResult IsValid(object value, ValidationContext validationContext)
{
if(value!=null)
{
if(value is int)
{
int minimumage = (int)value;
if(minimumage < _minAge)
{
return new ValidationResult("Minimum age must be " + _minAge);
}
}
}
return ValidationResult.Success;
}
}
}Let’s understand this code
Created MinAgeAttribute class derived from ValidationAttribute class. You must add a namespace using System.ComponentModel.DataAnnotations; in order to use ValidationAttribute class.
public class MinAgeAttribute : ValidationAttribute
2. Override IsValid method in order to push own custom logic.
3.
protected override ValidationResult IsValid(object value, ValidationContext validationContext)
[Required(ErrorMessage ="Age is Required")]
[FormValidation.CustomAttribute.MinAge(18)]
public int Age { get; set; }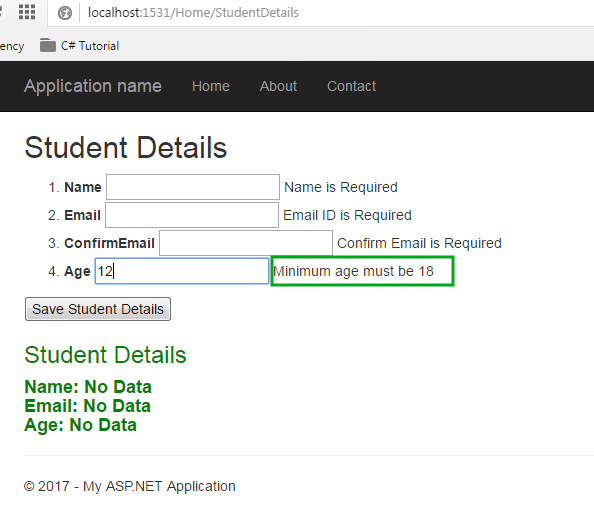
Summary
In this chapter, I explained how to use Data Annotation for validating input field in ASP.NET MVC 5. I also explained how to add custom validation rule in DataAnnotation. In the next chapter, you will learn Remote Validation in ASP.NET MVC. Remote Validation checks user input field instantly when the focus jumps out from input control.