1. How to create models and connect to the database using Entity Framework?
2. How to Install Entity Framework 6 in your ASP.NET MVC Project?
In the previous chapter, you learned Insert, Update and Delete using Models and without Entity Framework. Now, in this chapter, I will create the same project but this time I will use Entity Framework 6. Entity Framework 6 is a complete subject and you can Learn Complete Entity Framework HERE. In this chapter, you will learn how to Insert, Update and Delete in ASP.NET with the help of Entity Framework.
Entity Framework is essential part of ASP.NET MVC 5 and it is new technology that handles all the database related job very easily. You might be wonder by seeing thE power of EF. Installing EF is very easy. Here are the steps to install EF6.
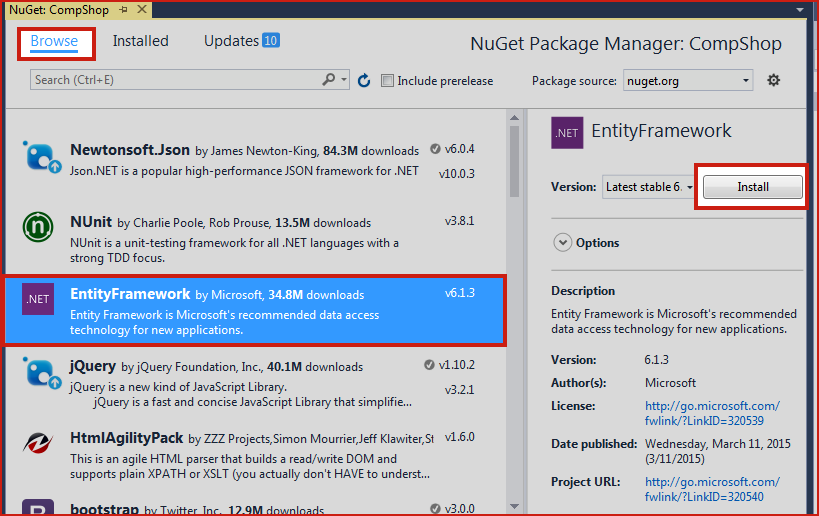
a. Right click on your Project Name Manage Nuget Packages…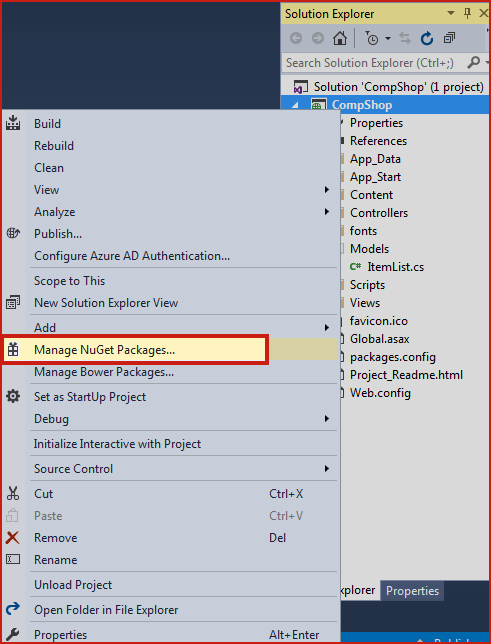 b. Click on Browse Link and find EntityFramework and click Install button to install it. Installing is very easy and takes just few seconds.
 c. After installing Entity framework you can see it in References folder in solution explorer.
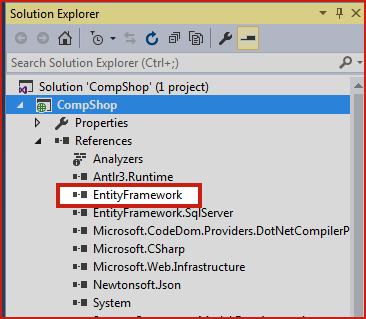
ItemStockModels and Paste following code in it.using System;
using System.Data.Entity;
namespace CompShop.Models
{
public class ItemStockModels
{
public int ID { get; set; }
public string Name { get; set; }
public string Category { get; set; }
public decimal Price { get; set; }
}
public class ItemStockContext : DbContext
    {
        public DbSet<ItemStockModels> StockModel { get; set; }
    }
}
Let’s take a moment to understand this code
Here you have noticed that I have added a namespace using System.Data.Entity; This namespace will allow you to inherit DBContext and all its features. DBContext is an important part of Entity Framework that allows your class to communicate with database. It works like a bridge between your entity classes and the databases.
public class ItemStockContext : DbContext
{
public DbSet<ItemStockModels> StockModel { get; set; }
}
Here
ItemStockContext is a connection string name and StockModel will be used for the table name.
web.config file.You don't need to worry about database and table. Provide a connection string and Entity Framework does all the job automatically. However, you can move without providing a connection string and in this situation, EF will create local DB and complete the process.
Step 1: Open Root Web.config file and paste the following code before </configuration> tag.<connectionStrings>
<add name="ItemStockContext" connectionString="Data Source=.\SQLExpress;Initial Catalog=CompShopDBwithoutEF;Integrated Security=True;Pooling=False" providerName="System.Data.SqlClient"/>
</connectionStrings>
Step 2: Build Your Application by Pressing Ctrl + Shift + B
Step 3: Add a Controller ItemStockController. Right click on Controller Add Controller.
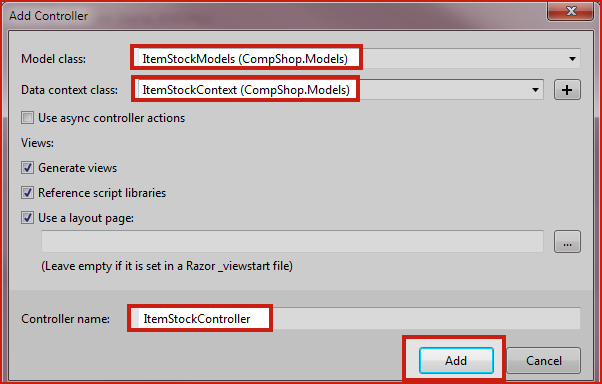
Step 4: Select MVC 5 Controller with views, using Entity Framework and click Add button.
Step 5: Select Item as in this picture and give Controller name ItemStockController and click Add.
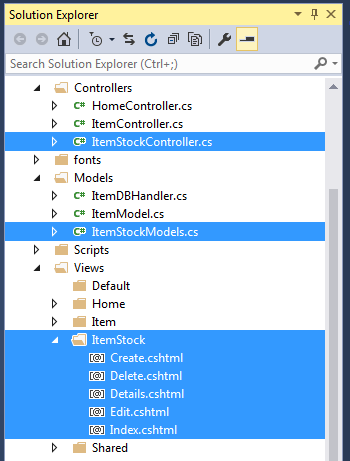
Step 6: It will automatically Add View Pages with Create, Delete, Details, Edit and Index page.
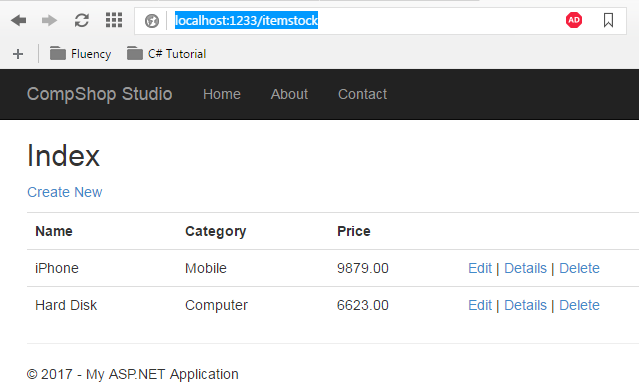
Step 7: Run your Project and navigate to following link:
http://localhost:1233/ItemStock
Summary
In this chapter, I taught you how to use Entity Framework for INSERT, UPDATE and DELETE operation in MVC 5. Entity Framework has not a single lesson but it is a separate complete course. Thankfully, I have written a complete course about Entity Framework. You must learn Entity Framework side by side learning with ASP.NET MVC 5.